Ford Fiesta: Handles, Locks, Latches and Entry Systems / Rear Door Latch. Removal and Installation
Ford Fiesta 2014 - 2019 Service Manual / Body and Paint / Handles, Locks, Latches and Entry Systems / Rear Door Latch. Removal and Installation
Removal
NOTE: RH shown, LH similar.
NOTE: Removal steps in this procedure may contain installation details.
All vehicles
-
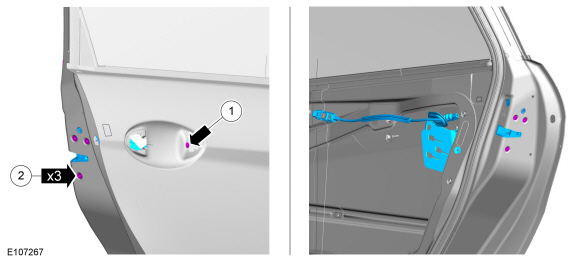
Remove the rear door trim panel.
Refer to: Rear Door Trim Panel (501-05 Interior Trim and Ornamentation, Removal and Installation).
-
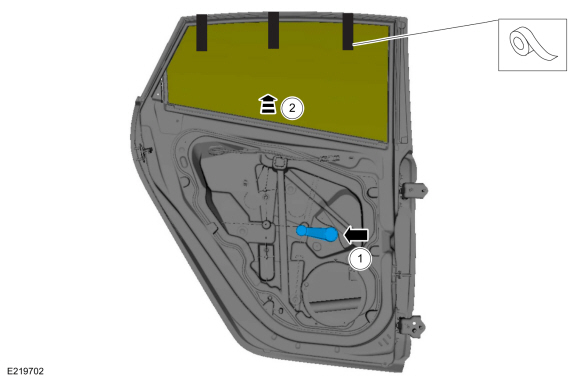
Remove the adhesive tape covers.
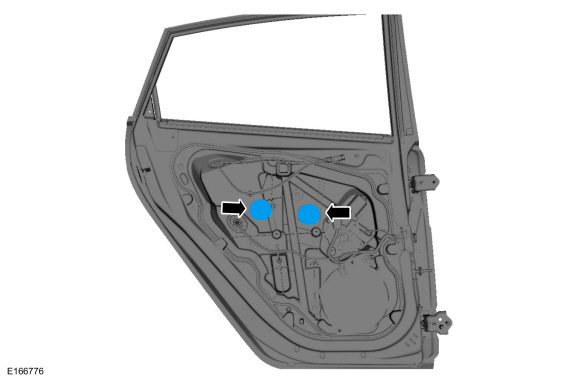 |
Vehicles with manual windows
-
Lower the rear door window glass.
-
Partially install the window crank handle.
-
Lower the rear door window glass.
-
Partially install the window crank handle.
 |
Vehicles with power windows
-
Lower the rear door window glass.
-
Partially install the rear door window control switch.
-
Lower the rear door window glass.
-
Partially install the rear door window control switch.
 |
All vehicles
-
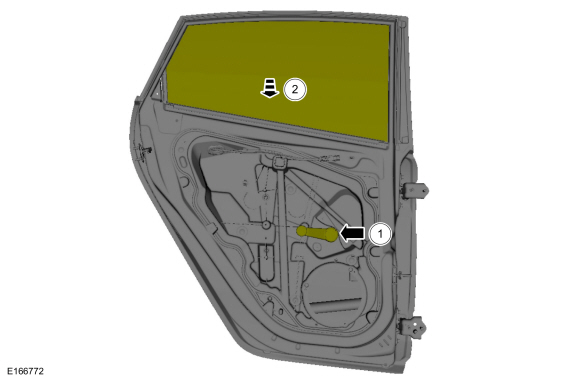
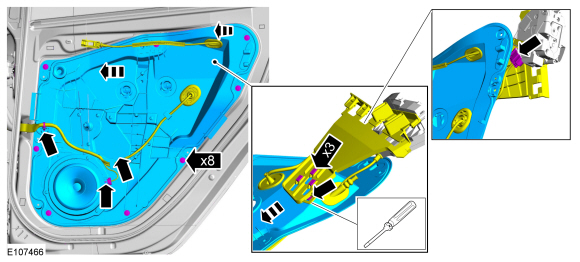
Remove the bolts from the rear door window glass.
Torque: 62 lb.in (7 Nm)
 |
Vehicles with manual windows
-
Raise the rear door window glass and tape the rear door window glass in place.
-
Remove the front door window crank handle.
-
Raise the front door window glass and tape the front door window glass in place.
-
Remove the front door window crank handle.
 |
-
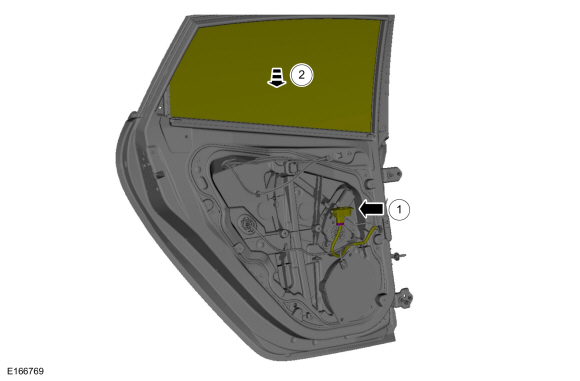
Remove the rear door carrier.
Torque: 71 lb.in (8 Nm)
 |
Vehicles with power windows
-
Raise the rear door window glass and tape the rear door window glass in place.
-
Remove the rear door window control switch.
-
Raise the rear door window glass.
-
Tape the rear door window glass in place.
-
Remove the rear door window control switch.
 |
-
Remove the rear door carrier.
Torque: 71 lb.in (8 Nm)
 |
All vehicles
-
Refer to: Exterior Rear Door Handle (501-14 Handles, Locks, Latches and Entry Systems, Removal and Installation).
-
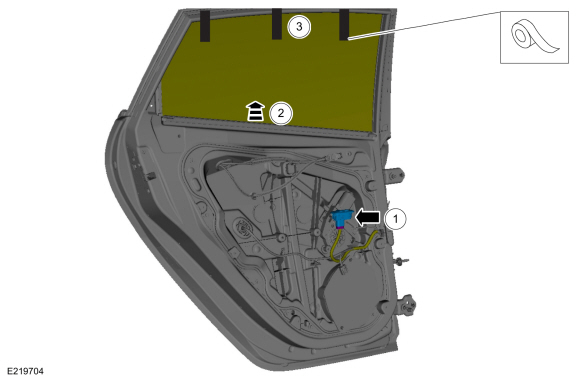
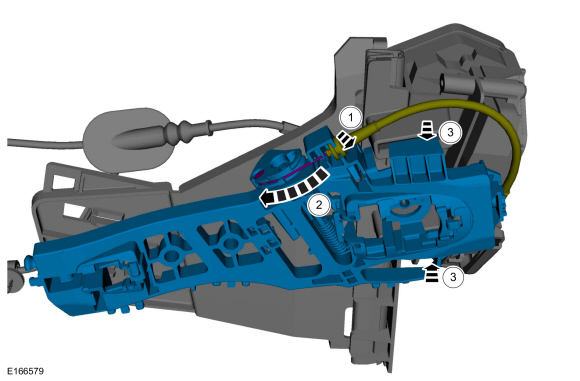
Remove the rear door latch.
-
Remove the screw from the exterior rear door handle reinforcement.
-
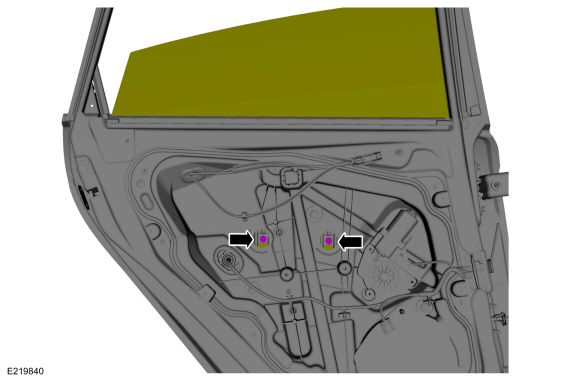
Remove the retainers from the rear door latch and remove the rear door latch.
Torque: 71 lb.in (8 Nm)
-
Remove the screw from the exterior rear door handle reinforcement.
 |
-
NOTE: This step is only necessary when installing a new component.
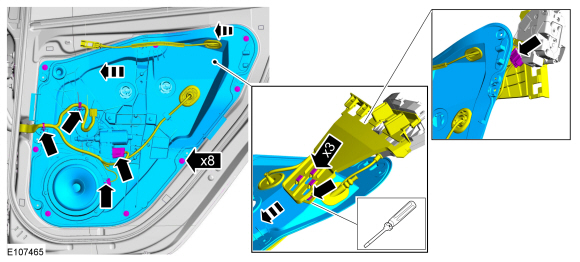
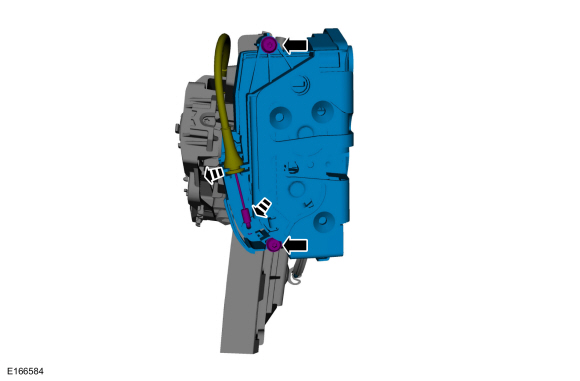
Remove the exterior rear door handle reinforcement.
-
Detach the cable from the exterior rear door handle reinforcement.
-
Remove the cable eyelet from the exterior rear door handle reinforcement.
-
Remove the exterior rear door handle reinforcement.
-
Detach the cable from the exterior rear door handle reinforcement.
 |
-
NOTE: This step is only necessary when installing a new component.
Remove the latch screws, disconnect the cables and remove the front door latch.
 |
-
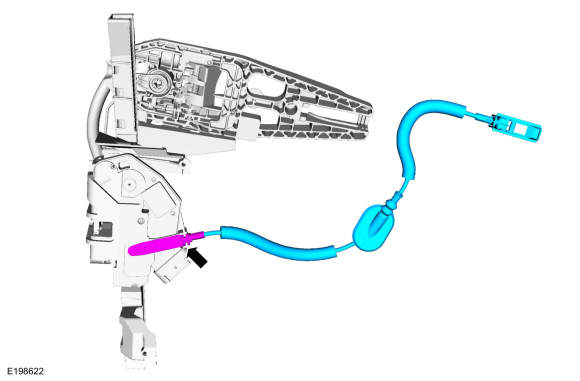
NOTE: This step is only necessary when installing a new component.
Remove interior rear door handle cable from the rear door latch.
 |
Installation
-
To install, reverse the removal procedure.
-
If the door is equipped with one-touch up, the power window motor must be initialized.
Refer to: Power Door Window Initialization (501-11 Glass, Frames and Mechanisms, General Procedures).
 Front Door Latch. Removal and Installation
Removal
NOTE:
Removal steps may contain installation details.
NOTE:
Driver side shown, passenger side similar.
All vehicles
Remove the front door trim panel...
 Luggage Compartment Lid Latch. Removal and Installation
Removal
NOTE:
Removal steps in this procedure may contain installation details.
Remove the luggage compartment lid trim panel...
Other information:
Ford Fiesta 2014 - 2019 Service Manual: Information and Entertainment System - Overview. Description and Operation
Overview The audio system consists of the following: Main Components: FCDIM (non-touchscreen display) 6 speakers ACM Audio input jack (if equipped) APIM FCIM GPSM Audio/SYNC steering wheel switches USB port/cable Main Features: Audio extended play Compass ..
Ford Fiesta 2014 - 2019 Service Manual: Accessory Drive. Diagnosis and Testing
Inspection and Verification Verify the customer concern. Visually inspect for obvious signs of mechanical damage. Visual Inspection Chart Mechanical Damaged or contaminated accessory drive belt Damaged or contaminated pulley(s) Damaged tensioner Incorrect accessory drive belt ..
Categories
- Manuals Home
- Ford Fiesta Service Manual (2014 - 2019)
- Camshafts. Removal and Installation
- Valve Cover. Removal and Installation
- Maintenance Schedules
- Front Strut and Spring Assembly. Removal and Installation
- Manual Transmission - 6-Speed Manual Transmission – B6
Ride Height Measurement. General Procedures
Special Tool(s) / General Equipment
Surface GaugeCheck
Ride Height Measurement - Front
NOTE: Make sure that the vehicle is positioned on a flat, level surface and the tires are inflated to the correct pressure. Vehicle should have a full tank of fuel.
Ride height = 2-3Measurement 2
Measurement 3
Use the General Equipment: Surface Gauge
Copyright © 2026 www.fofiesta7.com