Ford Fiesta: Body Closures / Front Door Alignment. General Procedures
Ford Fiesta 2014 - 2019 Service Manual / Body and Paint / Body Closures / Front Door Alignment. General Procedures
Inspection
-
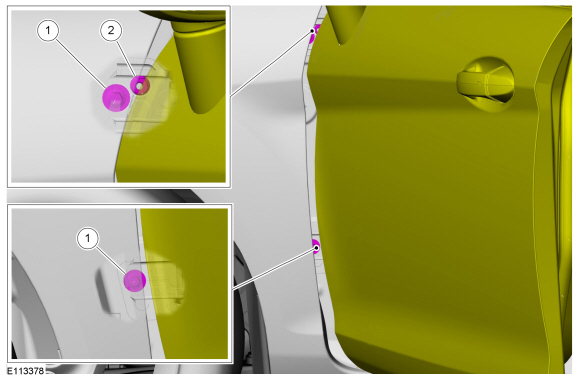
Check the body to the front door dimensions.
Refer to: Body and Frame (501-26 Body Repairs - Vehicle Specific Information and Tolerance Checks, Description and Operation).
Adjustment
NOTE: Removal steps in this procedure may contain installation details.
NOTE: LH side shown, RH side similar.
All alignments
-
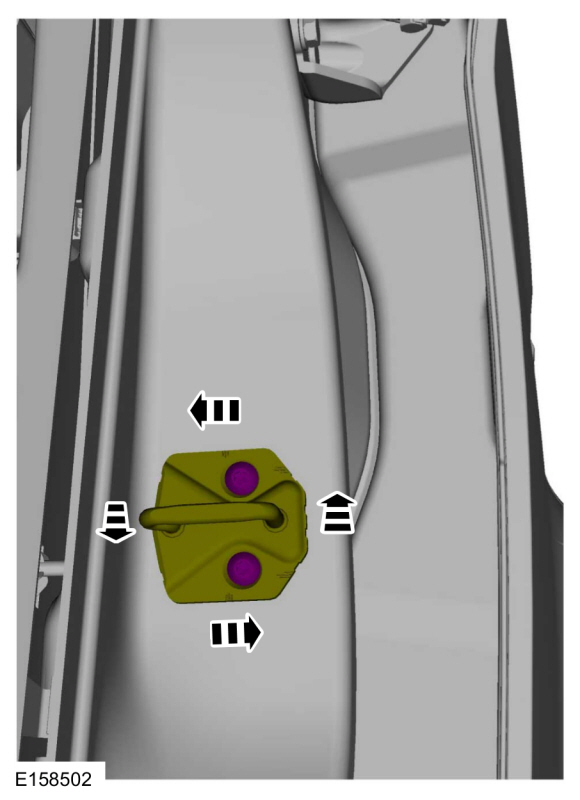
Remove the bolts and the striker assembly.
 |
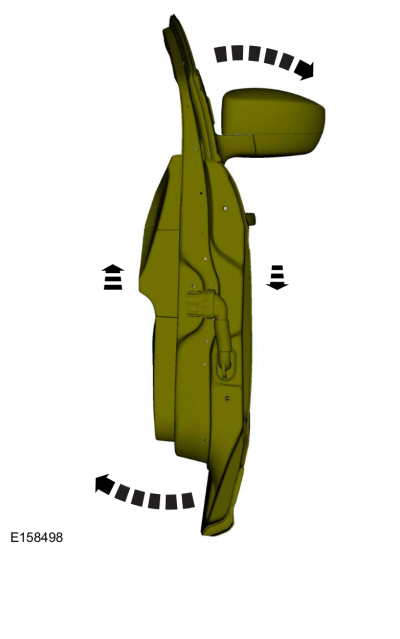
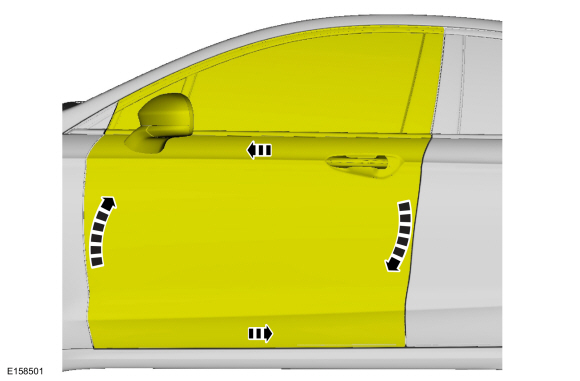
Front door in and out, up and down alignment
-
Loosen the bolts to permit movement of the door.
Loosen: 2 turn(s)
 |
-
Adjust the door to specification.
Refer to: Body and Frame (501-26 Body Repairs - Vehicle Specific Information and Tolerance Checks, Description and Operation).
 |
-
Tighten the bolts.
Torque: 18 lb.ft (24 Nm)
|
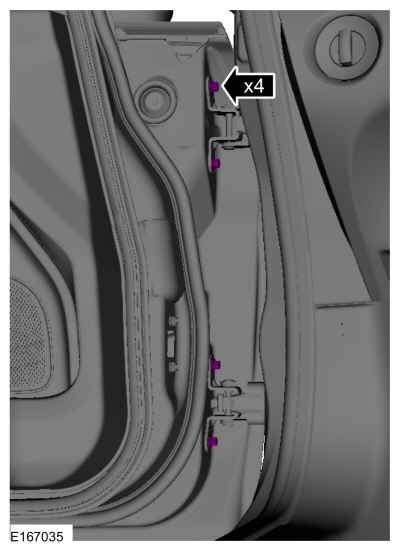
Front door fore, aft and tilt alignment
-
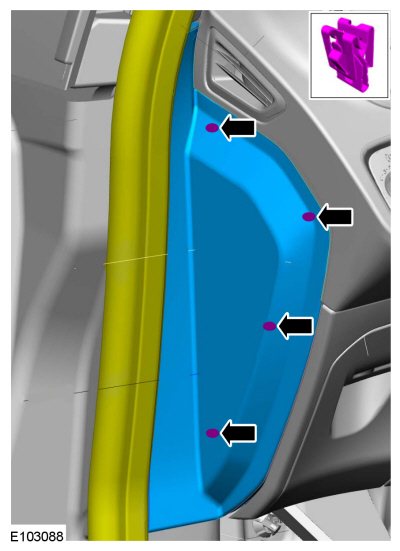
Position the front door weatherstrip aside, release the clips and remove the instrument finish panel.
 |
-
On passenger side:
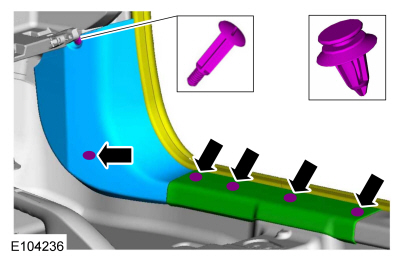
Position the front door weatherstrip aside, remove the push-pins, the scuff plate and the lower cowl trim panel.
 |
-
On driver side:
-
Remove the bolt.
-
Disconnect and position the electrical connector aside.
-
Remove the bolt.
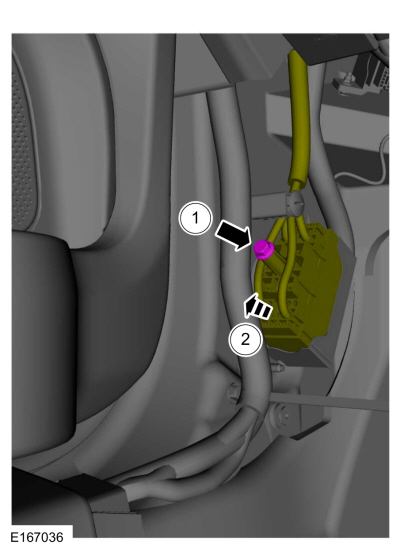 |
-
Remove the driver knee airbag.
Refer to: Driver Knee Airbag (501-20B Supplemental Restraint System, Removal and Installation).
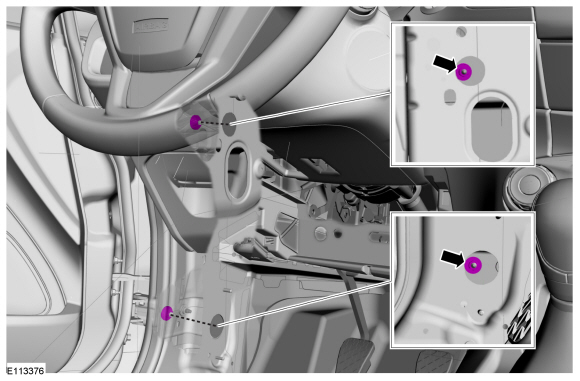
-
On driver side:
Loosen the nuts.
Loosen: 2 turn(s)
 |
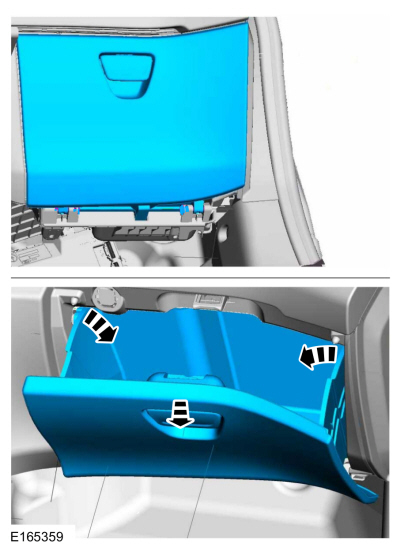
-
On passenger side:
Release the retaining tabs and remove the glove compartment.
 |
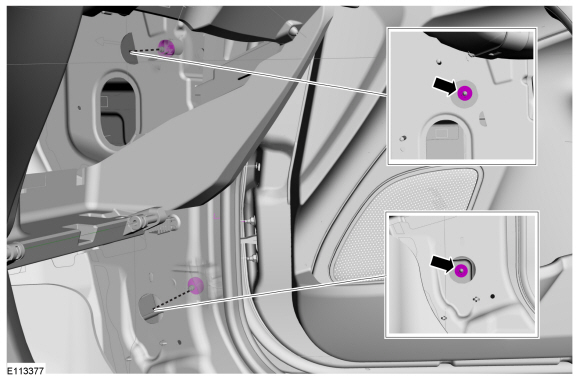
-
On passenger side:
Loosen the nuts.
Loosen: 2 turn(s)
 |
-
-
Loosen the bolts.
Loosen: 2 turn(s)
-
If equipped.
Loosen the nut.
Loosen: 2 turn(s)
-
Loosen the bolts.
 |
-
Adjust the door to specification.
Refer to: Body and Frame (501-26 Body Repairs - Vehicle Specific Information and Tolerance Checks, Description and Operation).
 |
-
-
Tighten the bolts.
Torque: 18 lb.ft (25 Nm)
-
If equipped.
Tighten the nut.
Torque: 106 lb.in (12 Nm)
-
Tighten the bolts.
|
-
On driver side:
Tighten the nuts.
Torque: 18 lb.ft (25 Nm)
|
-
On passenger side:
Tighten the nuts.
Torque: 18 lb.ft (25 Nm)
|
All alignments
-
Loosen the bolts to permit movement of the striker assembly.
Loosen:
: 2 turn(s)
 |
-
Tighten the bolts.
Torque: 18 lb.ft (25 Nm)
|
-
Check the body to the front door dimensions.
Refer to: Body and Frame (501-26 Body Repairs - Vehicle Specific Information and Tolerance Checks, Description and Operation).
-
Install the removed components.

 Rear Door Alignment. General Procedures
Inspection
Check the body to the rear door dimensions.
Refer to: Body and Frame (501-26 Body Repairs - Vehicle Specific Information and Tolerance Checks, Description and Operation)...
Other information:
Ford Fiesta 2014 - 2019 Service Manual: Gearshift Lever. Removal and Installation
Removal Remove the floor console. Refer to: Floor Console (501-12 Instrument Panel and Console, Removal and Installation). Disconnect the gearshift cable ends from the ball studs, slide the lock sleeve and remove the gearshift cables from the gearshift lever...
Ford Fiesta 2014 - 2019 Service Manual: Turbocharger Boost Pressure (TCBP) and Charger Air Cooler Temperature (CACT) Sensor. Removal and Installation
Removal NOTE: Removal steps in this procedure may contain installation details. With the vehicle in NEUTRAL, position it on a hoist. Refer to: Jacking and Lifting - Overview (100-02 Jacking and Lifting, Description and Operation)...
Categories
- Manuals Home
- Ford Fiesta Service Manual (2014 - 2019)
- Engine System - General Information
- Timing Belt. Removal and Installation
- Lower Arm. Removal and Installation
- Manual Transmission - 6-Speed Manual Transmission – B6
- Engine
Brake Master Cylinder. Removal and Installation
Removal
NOTICE: If the fluid is spilled on the paintwork, the affected area must be immediately washed down with cold water.
NOTE: Removal steps in this procedure may contain installation details.
All vehicles
Remove the battery tray.Refer to: Battery Tray - 1.6L Duratec-16V Ti-VCT (88kW/120PS) – Sigma (414-01 Battery, Mounting and Cables, Removal and Installation).
Refer to: Battery Tray - 1.6L EcoBoost (132kW/180PS) – Sigma (414-01 Battery, Mounting and Cables, Removal and Installation).
Disconnect the vacuum tube from the brake booster and detach the routing clip.
Copyright © 2026 www.fofiesta7.com