Ford Fiesta: Exterior Trim and Ornamentation / Rocker Panel Moulding. Removal and Installation
Special Tool(s) /
General Equipment
Removal
-
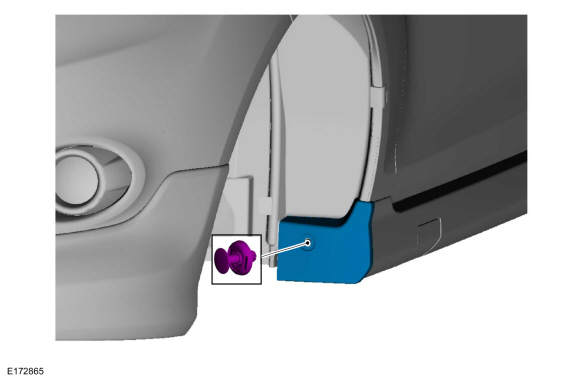
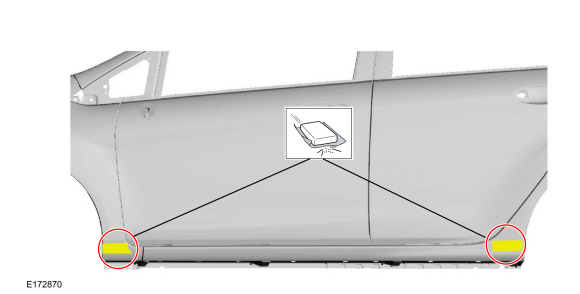
If equipped.
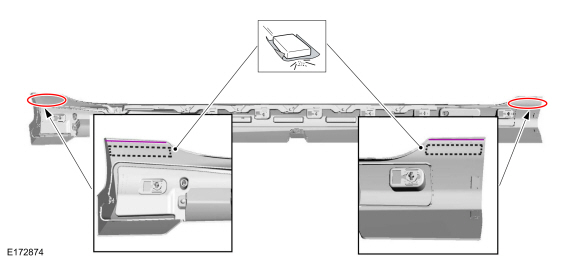
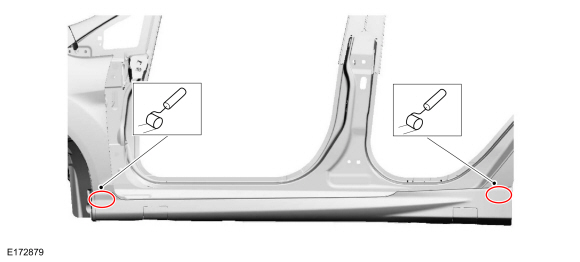
Remove the pushpin type retainer and the rocker panel moulding end cap.
-
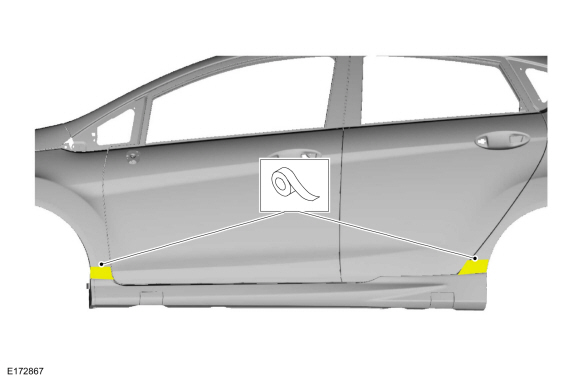
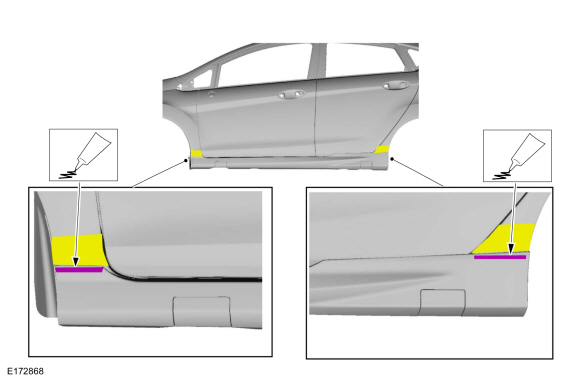
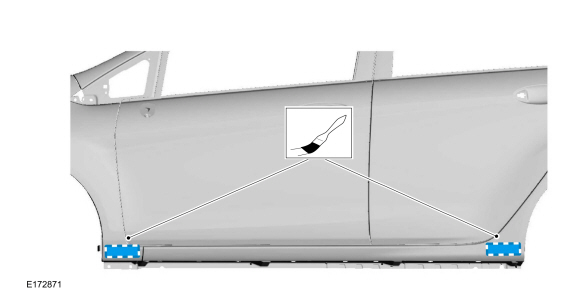
Clean the area and remove any remaining residue.
-
Apply wide roll masking tape above rocker panel moulding, front and rear.
Use the General Equipment: Adhesive Tape
-
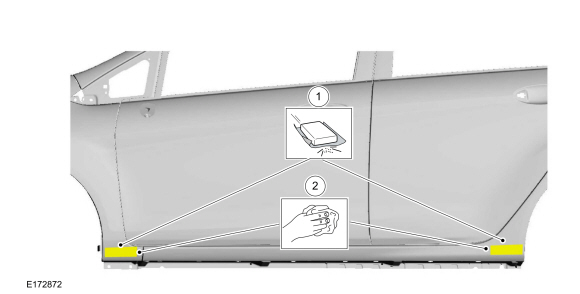
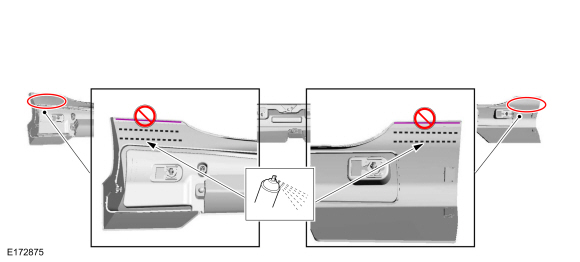
Apply 3M Prep Solvent or equivalent (obtain locally)
between rocker panel and sheet metal. Wait approximately 1 minute for
solvent to soften tape.
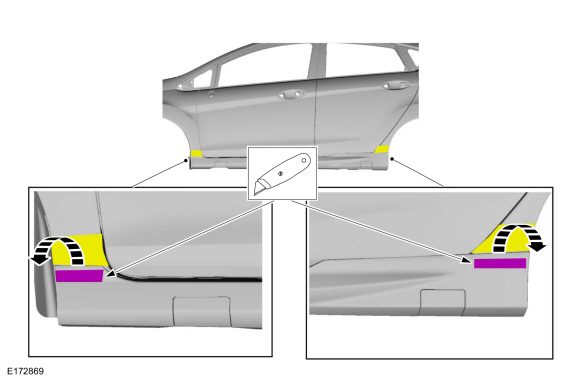
-
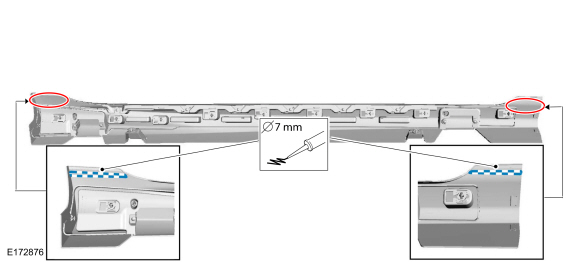
Cut through adhesive tape and urethane structural
adhesive with a rocking motion using a putty spatula and hammer or
equivalent.
Use the General Equipment: Spatula
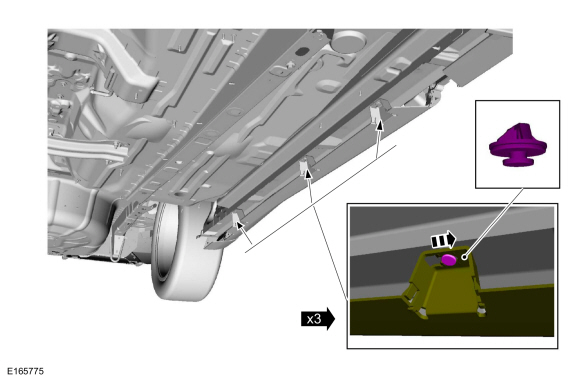
-
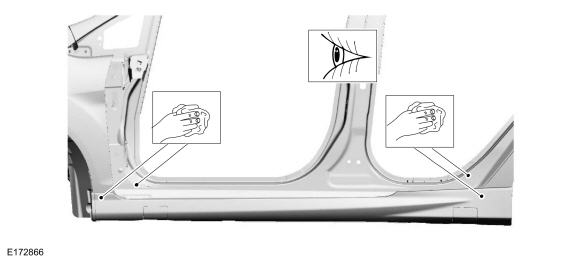
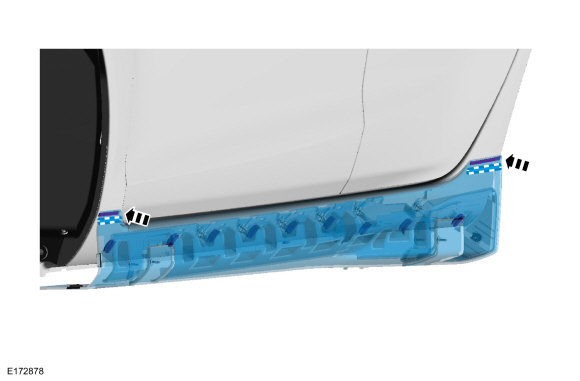
Remove the push type retainers.
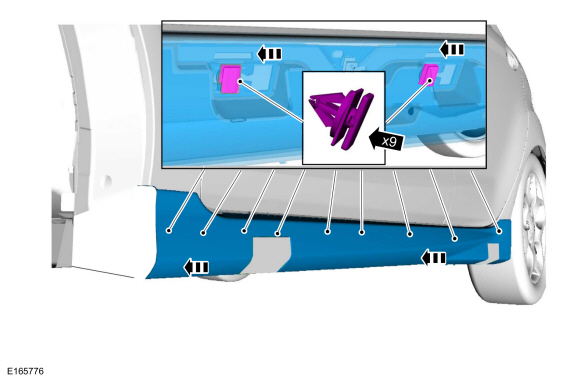
-
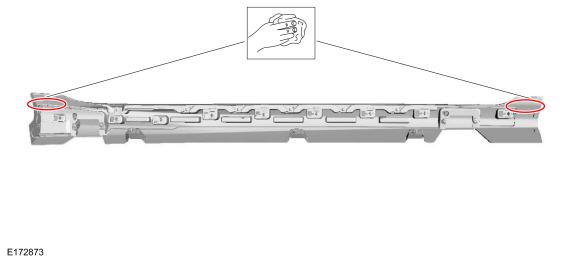
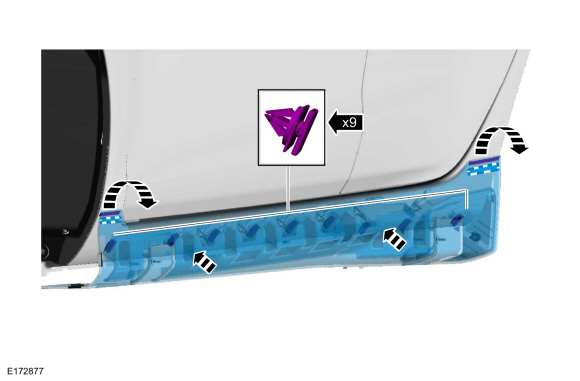
Slide rocker panel moulding forward to disengage from clips. Remove clips from vehicle.
-
NOTE:
Remove protective mylar patch at rear of rocker panel, if equipped.
Remove residual structural adhesive and tape residue using 3M Roloc Bristle Disc or equivalent (obtain locally).
-
NOTE:
If rear rocker panel area was equipped with a mylar
patch, anti-corrosion coating may not be required in this area.
NOTE:
Follow manufacturer's label directions for correct cure times.
Apply anti-corrosion coating using Motorcraft PM-13-A or
equivalent to a thickness of 2 mils. After the first coat has cured,
apply a second 2 mil coating.
Refer to: Corrosion Prevention (501-25 Body Repairs - General Information, General Procedures).
-
-
Scuff dried corrosion protection area using synthetic scuff pad or equivalent.
-
Clean area using isopropyl alcohol.
Installation
-
Clean indicated areas of rocker panel moulding using isopropyl alcohol.
-
Scuff indicated areas using synthetic scuff pad or
equivalent a minimum of 20 passes until area becomes light brown/white
in color.
-
Clean indicated areas of rocker panel moulding using isopropyl alcohol.
-
NOTE:
Avoid spraying primer on adhesive tape areas. Primer dry time is approximately 10 minutes.
Spray Lord Fusor 602 EZ primer or equivalent (obtain locally) on indicated areas.
-
NOTE:
Adhesive work time is 3-5 minutes at 23° C (73° F).
Work time reduces to 1.5 to 2.5 minutes at 32° C (90° F).
Apply Lord Fusor 153 Structural Urethane Adhesive or equivalent (obtain locally) as indicated.
-
Engage the 9 lower clips starting at the rear while
keeping the ends of rocker panel off the sheet metal until lower portion
of rocker panel is seated.
-
NOTE:
Clean any excess adhesive from vehicle with isopropyl alcohol and a clean towel.
NOTE:
Do not install end caps at this point.
Remove adhesive tape liner(s) and press rocker panel ends to bond rocker panel to vehicle sheet metal.
-
NOTE:
It is recommended to wait approximately 90 minutes before installing the end cap(s) and returning vehicle.
Apply the sealant.
-
Install the rocker panel moulding end cap and the pushpin type retainer.
Repair
NOTE:
Mouldings located on the front and rear window frames may
experience minor scratches from vehicle shipment or car wash racks. The
imperfections may be repaired instead of replacing components by
following the steps below...
Removal
NOTE:
Removal steps in this procedure may contain installation details.
Remove the high mounted stoplamp.
Refer to: High Mounted Stoplamp (417-01 Exterior Lighting, Removal and Installation)...
Other information:
Removal
NOTE:
LH side shown, RH side similar.
Remove the access plug and loosen the exterior front door handle retaining screw.
Remove the exterior front door handle cover and if equipped the front door lock cylinder...
Materials
Name
Specification
Motorcraft® Ultra-Clear Spray Glass CleanerZC-23
ESR-M14P5-A
Motorcraft® Rear Window Defroster RepairPM-11
WSB-M4J58-B
Motorcraft® Lacquer Touch-Up PaintPMPC-19500-XXXXA, PMPM-19500-XXXXG, PMPP-19500-XXXXA
ESR-M2P100-C
Repair
NOTE:
The antenna and heated window grid line material is not..
Categories
Removal
NOTE:
Removal steps in this procedure may contain installation details.
Remove the brake shoes.
Refer to: Brake Shoes (206-02 Drum Brake, Removal and Installation).
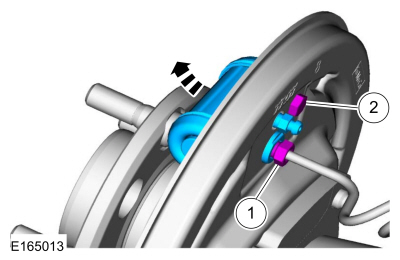
Disconnect the brake tube fitting.
Torque:
159 lb.in (18 Nm)
Remove the bolt and wheel cylinder.
Torque:
106 lb.in (12 Nm)
Disconnect the brake shoe lever fitting and re
read more
 Finish Panel Repair. General Procedures
 Rear Spoiler - 5-Door. Removal and Installation