Ford Fiesta: Information and Entertainment System - General Information - Vehicles With: AM/FM/CD/SYNC / Microphone. Removal and Installation
Ford Fiesta 2014 - 2019 Service Manual / Information and Entertainment Systems / Information and Entertainment System - General Information - Vehicles With: AM/FM/CD/SYNC / Microphone. Removal and Installation
Special Tool(s) / General Equipment
| Interior Trim Remover |
Removal
NOTE: If the microphone is removed from the headliner, a new microphone must be installed.
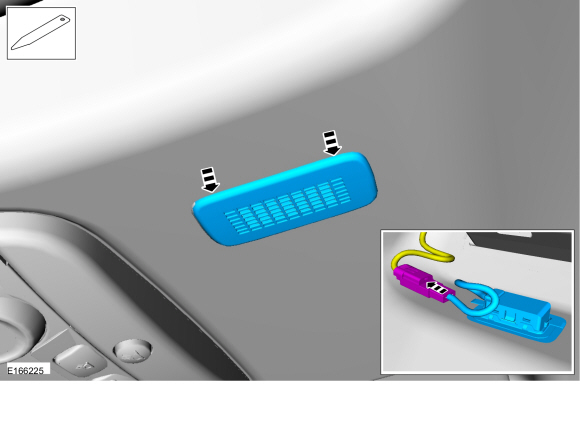
Headliner Microphone
-
Pry the microphone bezel from the headliner metal mounting bracket and remove the microphone from the headliner by grasping the microphone pigtail.
-
Disconnect the electrical connector.
Use the General Equipment: Interior Trim Remover
-
Disconnect the electrical connector.
 |
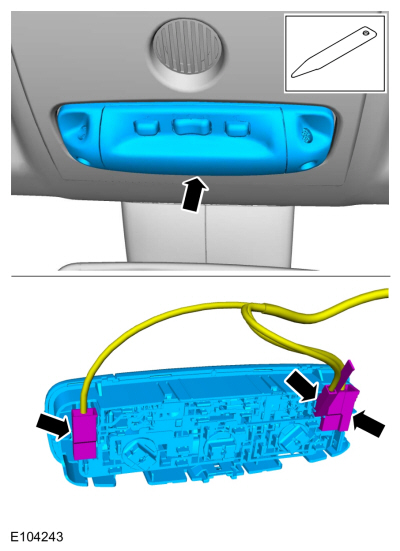
Overhead Console Microphone
NOTE: Overhead console without sunglass bin shown, overhead console with sunglass bin similar.
-
Remove the overhead console lighting switch.
-
Disconnect the electrical connectors.
Use the General Equipment: Interior Trim Remover
-
Disconnect the electrical connectors.
 |
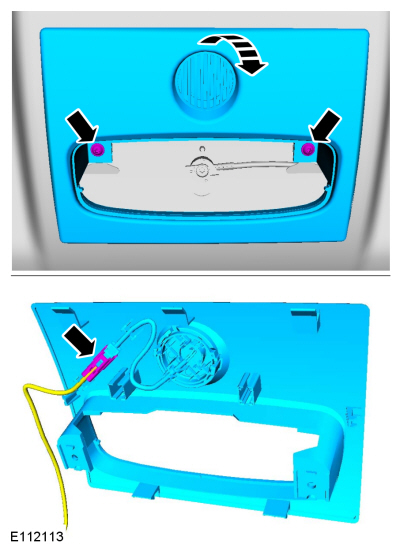
-
Remove the screws and the overhead console.
-
Disconnect the electrical connector.
-
Disconnect the electrical connector.
 |
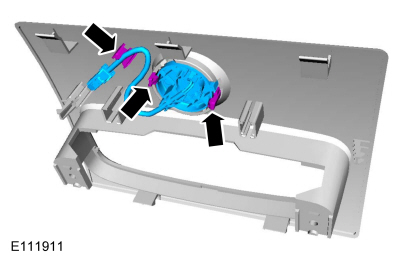
-
Release the tabs, detach the retainer and remove the Sync Microphone.
 |
Installation
Headliner Microphone
-
Connect the microphone electrical connector.
-
Wrap the connection with anti-rattle tape.
-
Feed the microphone pigtail into the headliner
through the microphone hole. Verify the microphone pigtail points
towards the front of the vehicle.
-
Snap the microphone into the headliner mounting bracket.
-
Install the headliner mounting bracket in the headliner.
Overhead Console Microphone
-
To install, reverse the removal procedure.
 Global Positioning System Module (GPSM). Removal and Installation
Special Tool(s) /
General Equipment
Interior Trim Remover
Removal
NOTE:
This step is only necessary when installing a new component...
 Rear Door Speaker. Removal and Installation
Removal
NOTE:
Removal steps in this procedure may contain installation details.
Remove the rear door trim panel.
Refer to: Rear Door Trim Panel (501-05 Interior Trim and Ornamentation, Removal and Installation)...
Other information:
Ford Fiesta 2014 - 2019 Service Manual: Cylinder Head. Removal and Installation
Special Tool(s) / General Equipment Strap Wrench Oil Drain Equipment Hose Clamp Remover/Installer Materials Name Specification Motorcraft® Metal Surface Prep WipesZC-31-B - Engine Oil - SAE 5W-20 - Synthetic Blend Motor OilXO-5W20-Q1SP WSS-M2C945-B1 Removal Refer to: Jacking and Lifting - Over..
Ford Fiesta 2014 - 2019 Service Manual: Steering Wheel Cover Repair. General Procedures
Materials Name Specification Motorcraft® Instant Gel AdhesiveTA-19-C WSS-M2G401-B5 Repair NOTE: If re-adhering leather to the front side of the steering wheel only, it will not be necessary to remove the steering wheel. Steering wheel removal is necessary only when repairing loose leather on the backside of the steering wheel. If nece..
Categories
- Manuals Home
- Ford Fiesta Service Manual (2014 - 2019)
- Service Information
- Cylinder Head. Removal and Installation
- Front Suspension
- Jacking and Lifting - Overview. Description and Operation
- Engine Component View. Description and Operation
Rear Wheel Speed Sensor. Removal and Installation
Removal
NOTE: Removal steps in this procedure may contain installation details.
Remove the retainer and pull the rear splash shield outward.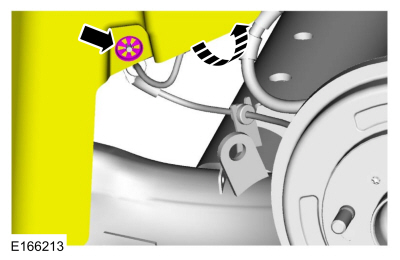 Disconnect the electrical connector and detach the wiring retainer.
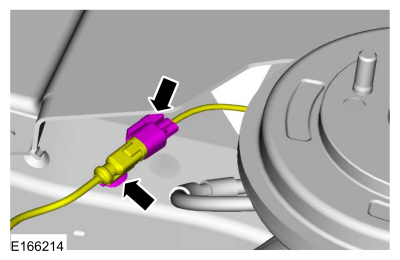
Copyright © 2026 www.fofiesta7.com