Ford Fiesta: Interior Trim and Ornamentation / Front Door Trim Panel. Removal and Installation
Ford Fiesta 2014 - 2019 Service Manual / Body and Paint / Interior Trim and Ornamentation / Front Door Trim Panel. Removal and Installation
Special Tool(s) / General Equipment
| Interior Trim Remover |
Removal
NOTE: Removal steps in this procedure may contain installation details.
-
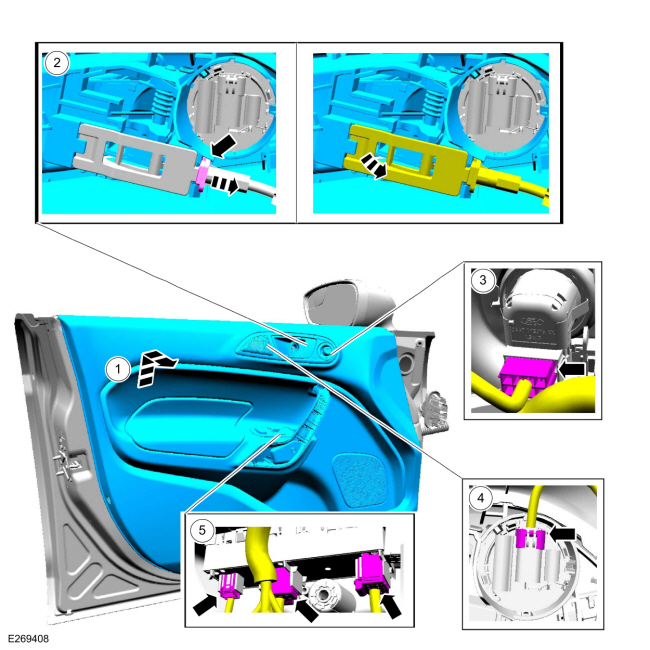
Remove the interior door handle covers.
Use the General Equipment: Interior Trim Remover
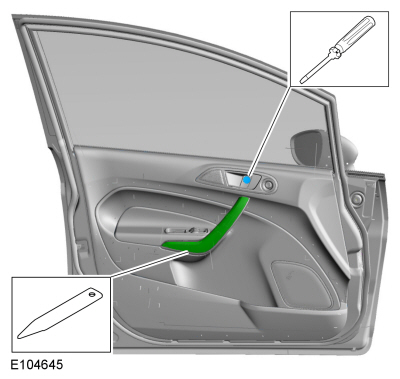 |
-
Remove the door trim panel retainers.
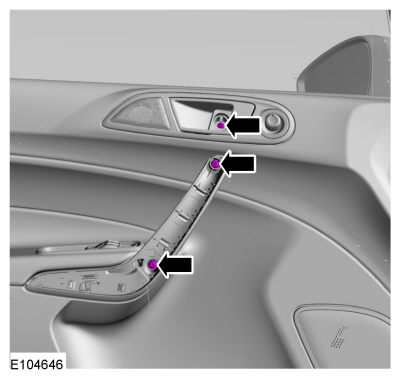 |
Vehicles with manual windows
-
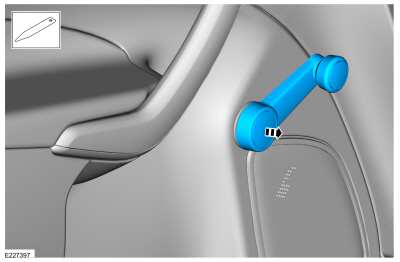
NOTE: Work evenly around the manual window regulator handle when removing it from the regulator.
Remove the manual window regulator handle.
Use the General Equipment: Interior Trim Remover
 |
All vehicles
-
-
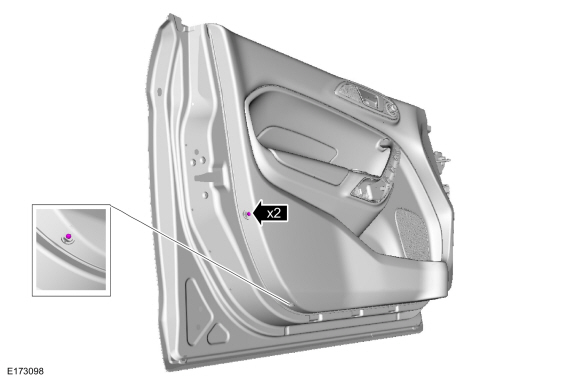
Remove the front door trim panel screws.
Use the General Equipment: Interior Trim Remover
-
Remove the front door trim panel screws.
 |
-
Release the front door trim panel clips in the following sequence.
-
Release the lower RH front door trim panel clip.
Use the General Equipment: Interior Trim Remover
-
Release the lower front door trim panel clip
Use the General Equipment: Interior Trim Remover
-
Remove the lower front door trim panel clip.
Use the General Equipment: Interior Trim Remover
-
Remove the lower LH front door trim panel clip.
Use the General Equipment: Interior Trim Remover
-
Remove the RH middle front door trim panel clip.
Use the General Equipment: Interior Trim Remover
-
Remove the LH middle front door trim panel clip.
Use the General Equipment: Interior Trim Remover
-
Remove the RH upper front door trim panel clip.
Use the General Equipment: Interior Trim Remover
-
Remove the LH upper front door trim panel clip.
Use the General Equipment: Interior Trim Remover
-
Release the lower RH front door trim panel clip.
 |
-
Remove the front door trim panel.
-
Lift upward and outward on the front door trim panel.
-
Release the tab and disconnect the front door latch cable.
-
If equipped.
Disconnect the power mirror control switch electrical connector.
-
If equipped.
Disconnect the front door tweeter speaker electrical connector.
-
If equipped.
Disconnect the front door window control switch electrical connectors.
-
Lift upward and outward on the front door trim panel.
 |
Installation
-
To install, reverse the removal procedure.
Vehicles With: One-Touch Up and Down Window
-
NOTE: The master window control switch and the LH window motor must be initialized whenever battery voltage has been removed from the driver window control switch for greater than 3 minutes (for example, the battery or the master window switch is disconnected) or if a new driver window control switch is installed.
Refer to: Power Door Window Initialization (501-11 Glass, Frames and Mechanisms, General Procedures).
 Steering Column Shrouds. Removal and Installation
Removal
Release the tabs and remove the upper steering column shroud.
Rotate the steering wheel and remove the lower steering column shroud retainer...

Other information:
Ford Fiesta 2014 - 2019 Service Manual: Rear Bumper. Removal and Installation
Removal All vehicles NOTE: Removal steps in this procedure may contain installation details. Remove the rear bumper cover. Refer to: Rear Bumper Cover (501-19 Bumpers, Removal and Installation). 4-Door Remove the nuts and the rear bumper. Torque: 18..
Ford Fiesta 2014 - 2019 Service Manual: Clutch Controls - System Operation and Component Description. Description and Operation
System Operation Hydraulic Clutch Actuation System The design of the clutch actuation system is very similar to that of a hydraulic brake system. The hydraulic clutch actuation system uses a hydraulic line rather than a mechanical connection to transmit the pedal movement. The forces are transmitted purely hydraulically and the brake fluid is used for drive transmission. ..
Categories
- Manuals Home
- Ford Fiesta Service Manual (2014 - 2019)
- Lower Arm. Removal and Installation
- Cylinder Head. Removal and Installation
- Valve Cover. Removal and Installation
- Maintenance Schedules
- Manual Transmission - 6-Speed Manual Transmission – B6
Rear Wheel Speed Sensor. Removal and Installation
Removal
NOTE: Removal steps in this procedure may contain installation details.
Remove the retainer and pull the rear splash shield outward.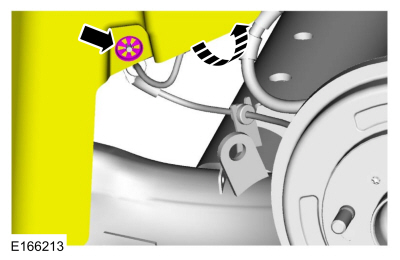 Disconnect the electrical connector and detach the wiring retainer.
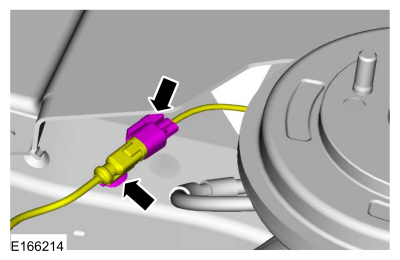
Copyright © 2026 www.fofiesta7.com