
Ford Fiesta: Interior Trim and Ornamentation / C-Pillar Lower Trim Panel. Removal and Installation
Ford Fiesta 2014 - 2019 Service Manual / Body and Paint / Interior Trim and Ornamentation / C-Pillar Lower Trim Panel. Removal and Installation
Removal
NOTE: RH side shown, LH side similar.
NOTE: Removal steps in this procedure may contain installation details.
NOTE: To avoid damage to the trim panels, remove any retaining clips from the body and attach them to the trim panels before installing.
All vehicles
-
Position aside the rear door weatherstrip.
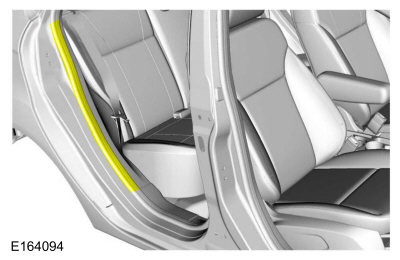 |
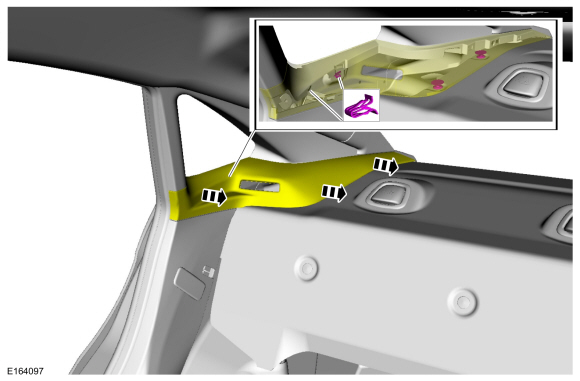
4-Door
-
NOTE: Rear seat and safety belt removed for clarity.
Release the clips and position aside the trim panel.
 |
All vehicles
-
Remove the rear seat cushion.
Refer to: Rear Seat Cushion (501-10 Seating, Removal and Installation).
-
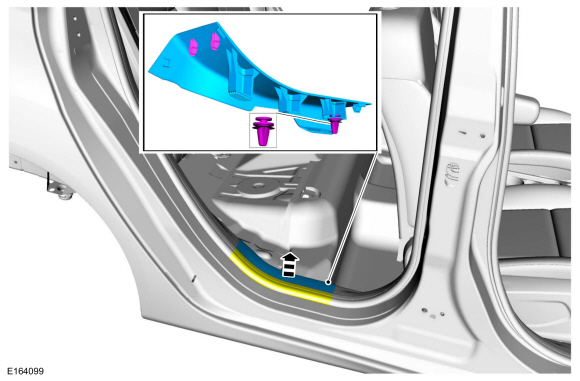
Position aside the read door weatherstrip, release the clips and remove the rear door scuffplate trim panel.
 |
-
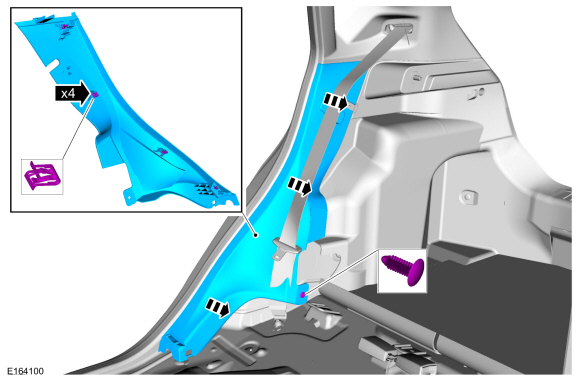
NOTE: Rear seat removed for clarity.
Remove the pin-type retainer, release the clips and remove the lower C-pillar trim panel.
 |
Installation
-
To install, reverse the removal procedure.
 B-Pillar Trim Panel. Removal and Installation
Removal
NOTE:
LH side shown, RH side similar.
NOTE:
Removal steps in this procedure may contain installation details.
NOTE:
To avoid damage to the trim panels, remove any retaining
clips from the body and attach them to the trim panels before
installing...
 C-Pillar Upper Trim Panel - 5-Door. Removal and Installation
Removal
NOTE:
RH side shown, LH side similar.
NOTE:
Removal steps in this procedure may contain installation details.
NOTE:
To avoid damage to the trim panels, remove any retaining
clips from the body and attach them to the trim panels before
installing...
Other information:
Ford Fiesta 2014 - 2019 Service Manual: Instrument Panel Center Upper Trim Panel. Removal and Installation
Special Tool(s) / General Equipment Interior Trim Remover Removal NOTE: Instrument panel center upper trim panel with 6.5 inch screen shown, 4.2 inch screen similar. Release the clips and remove the instrument panel center upper trim panel...
Ford Fiesta 2014 - 2019 Service Manual: Accelerator Pedal. Removal and Installation
Removal NOTE: Removal steps in this procedure may contain installation details. NOTE: To prevent setting Diagnostic Trouble Codes (DTCs), make sure the ignition switch is in the OFF position prior to disconnecting the accelerator pedal electrical connector...
Categories
- Manuals Home
- Ford Fiesta Service Manual (2014 - 2019)
- Engine - 1.6L EcoBoost (132kW/180PS) – Sigma
- Engine System - General Information
- Service Information
- Clutch - 6-Speed Manual Transmission – B6
- Lower Arm. Removal and Installation
Front Strut and Spring Assembly. Removal and Installation
Removal
NOTE: Removal steps in this procedure may contain installation details.
NOTE: This step is only necessary when installing a new component to the left-hand side.
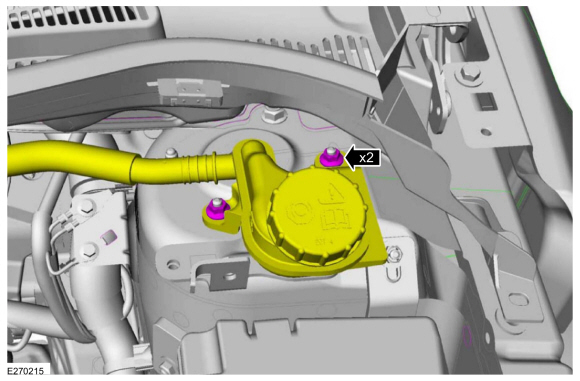
Remove the nuts and position aside the remote brake fluid reservoir.Torque: 62 lb.in (7 Nm)
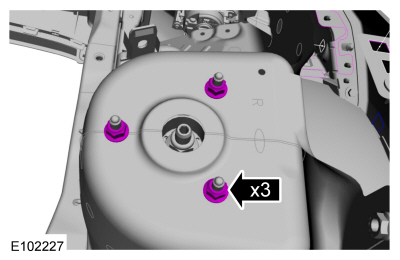
 Remove the strut and spring assembly upper mount nuts.
 Torque: 22 lb.ft (30 Nm)

Copyright © 2026 www.fofiesta7.com