Ford Fiesta: Climate Control System - General Information / Refrigerant Identification Testing. General Procedures
Special Tool(s) / General Equipment
| Refrigerant Identification Equipment |
Activation
-
NOTE: Use Refrigerant Identification Equipment to identify gas samples taken directly from the refrigeration system or storage containers prior to recovering or charging the refrigerant system.
NOTE: Use Refrigerant Identification Equipment that conforms to SAE J1771 for R-134a or SAE J2912 standard identifies R-134a and R-1234yf.
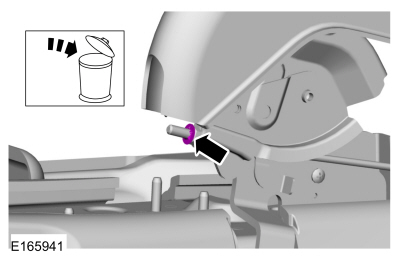
Follow the instructions included with Refrigerant Identification Equipment to obtain the sample for testing.
-
198‐RI2012yfp A/C Refrigerant Analyzer for use with R134a and R1234yf vehicles
Use the General Equipment: Refrigerant Identification Equipment
-
198‐RI2012yfp A/C Refrigerant Analyzer for use with R134a and R1234yf vehicles
-
NOTE: The refrigerant identifier displays one of the following:
-
If the purity level of R-134a is 98% or greater by weight, the green
PASS LED . The weight concentrations of R-134a, R-12, R-22, hydrocarbons
and air will be displayed on the digital display.
-
If refrigerant R-134a does not meet the 98% purity level, the red FAIL LED
and an alarm sounds alerting the user of potential hazards. The weight
concentrations of R-134a, R-12, R-22 and hydrocarbons are displayed on
the digital display.
-
If hydrocarbon concentrations are 2% or greater by weight, the red FAIL LED
, "Hydrocarbon High" will be displayed on the digital display, and an
alarm sounds alerting the user of potential hazards. The weight
concentrations of R-134a, R-12, R-22 and hydrocarbons also are displayed
on the digital display.
-
If the purity level of R-134a is 98% or greater by weight, the green
PASS LED . The weight concentrations of R-134a, R-12, R-22, hydrocarbons
and air will be displayed on the digital display.
-
The percentage of air contained in the sample is
displayed if the R-134a content is 98% or greater. The refrigerant
identifier eliminates the effect of air when determining the refrigerant
sample content because air is not considered a contaminant, although
air can affect A/C system
performance. When the refrigerant identifier has determined that a
refrigerant source is pure (R-134a is 98% or greater by weight) and air
concentration levels are 2% or greater by weight, it prompts the user if
an air purge is desired.
-
If contaminated refrigerant is detected, repeat the
refrigerant identification test to verify the refrigerant is indeed
contaminated.
-
NOTICE: If contaminated refrigerant is detected, DO NOT recover the refrigerant into R-134a recovery/recycling equipment. Recovery of contaminated refrigerant contaminates the recovered refrigerant supply and may damage the recovery/recycling equipment.
NOTE: Install a new suction accumulator, receiver drier or receiver drier element as directed by the A/C system flushing procedure.
Recover the contaminated refrigerant using suitable recovery-only equipment designed for capturing and storing contaminated refrigerant only.
-
Determine and correct the cause of the customer's initial concern.
-
Refer to Air Conditioning (A/C) System Flushing procedure in Group 412.
-
Dispose of the contaminated refrigerant in accordance with all federal, state and local regulations.
 Heater Core Leak Check. General Procedures
Inspection
NOTE:
A coolant leak in the heater hose could follow the
heater core tube to the heater core and appear as a leak in the heater
core...
 Refrigerant Oil Adding. General Procedures
Special Tool(s) /
General Equipment
Air Conditioning Service Unit
Refrigerant Oil Injector Set
Filling
Adjust the oil injector piston and fill the oil
injector with the correct amount of clean, new Motorcraft® PAG
Refrigerant Compressor Oil (YN-12-D)...
Other information:
Ford Fiesta 2014 - 2019 Service Manual: Blower Motor Speed Control - Vehicles With: Electronic Automatic Temperature Control (EATC). Removal and Installation
Removal NOTE: Removal steps in this procedure may contain installation details. Remove the push pin, release the clips and remove the RH floor console trim panel. Disconnect the electrical connectors, remove the retainers and the blower motor speed control...
Ford Fiesta 2014 - 2019 Service Manual: Halfshaft Bearing - 1.6L EcoBoost (132kW/180PS) – Sigma. Removal and Installation
Special Tool(s) / General Equipment 205-343 (T95P-3514-A) Installer, Constant Velocity Joint Boot ClampTKIT-1995-FTKIT-1995-FM/FLMTKIT-1995-LM/M 205-D064 (D84L-1123-A) Puller, Bearing Flat Headed Screw Driver Hydraulic Press Materials Name Specification Motorcraft® Constant Velocity Joint GreaseXG-5 WSS-M1C258-A1 ..
Categories
- Manuals Home
- Ford Fiesta Service Manual (2014 - 2019)
- Front Suspension
- Engine System - General Information
- Cylinder Head. Removal and Installation
- Service Information
- Jacking and Lifting - Overview. Description and Operation
Parking Brake Control. Removal and Installation
Removal
NOTE: Removal steps in this procedure may contain installation details.
Remove the floor console.Refer to: Floor Console (501-12 Instrument Panel and Console, Removal and Installation).
Remove the driver seat.
Refer to: Front Seat (501-10 Seating, Removal and Installation).
Remove the parking brake cable adjustment lock nut.
 Loosen the parking brake cable adjustment nut.