Ford Fiesta: Glass, Frames and Mechanisms / Rear Door Window Regulator. Removal and Installation
Ford Fiesta 2014 - 2019 Service Manual / Body and Paint / Glass, Frames and Mechanisms / Rear Door Window Regulator. Removal and Installation
Removal
NOTE: RH shown, LH similar.
NOTE: Removal steps in this procedure may contain installation details.
All vehicles
-
Remove the rear door trim panel.
Refer to: Rear Door Trim Panel (501-05 Interior Trim and Ornamentation, Removal and Installation).
-
Remove the adhesive tape covers.
 |
Vehicles with manual windows
-
Lower the rear door window glass.
-
Partially install the window crank handle.
-
Lower the rear door window glass.
-
Partially install the window crank handle.
 |
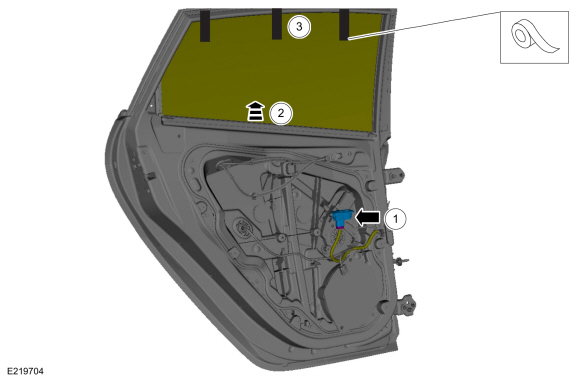
Vehicles with power windows
-
Lower the rear door window glass.
-
Partially install the rear door window control switch.
-
Lower the rear door window glass.
-
Partially install the rear door window control switch.
 |
All vehicles
-
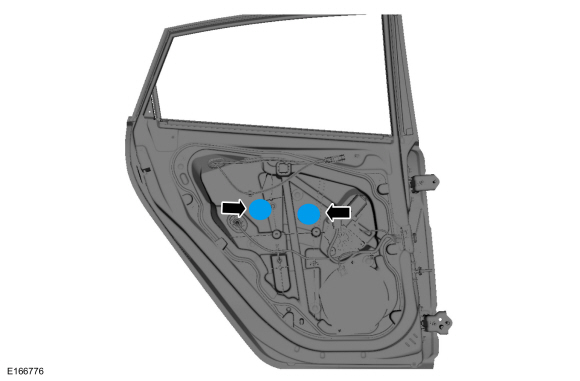
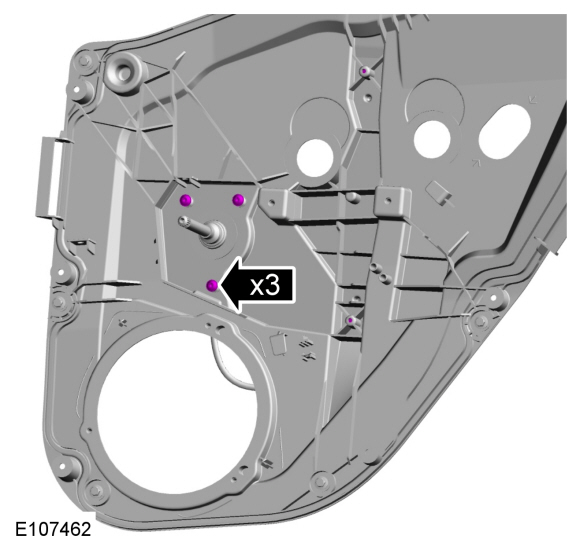
Remove the bolts from the rear door window glass.
Torque: 62 lb.in (7 Nm)
 |
Vehicles with manual windows
-
Raise the rear door window glass and tape the rear door window glass in place.
-
Remove the front door window crank handle.
-
Raise the front door window glass and tape the front door window glass in place.
-
Remove the front door window crank handle.
 |
-
Remove the rear door carrier.
Torque: 71 lb.in (8 Nm)
 |
-
Remove the retainers from the rear door window regulator.
Torque: 31 lb.in (3.5 Nm)
 |
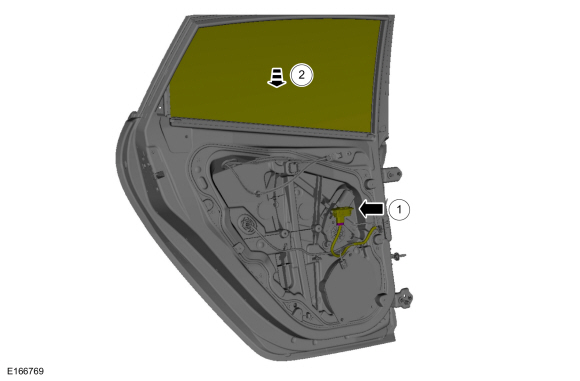
Vehicles with power windows
-
Raise the rear door window glass and tape the rear door window glass in place.
-
Remove the rear door window control switch.
-
Raise the rear door window glass.
-
Tape the rear door window glass in place.
-
Remove the rear door window control switch.
 |
-
Remove the rear door carrier.
Torque: 71 lb.in (8 Nm)
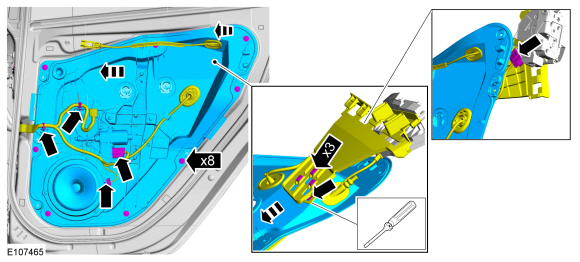 |
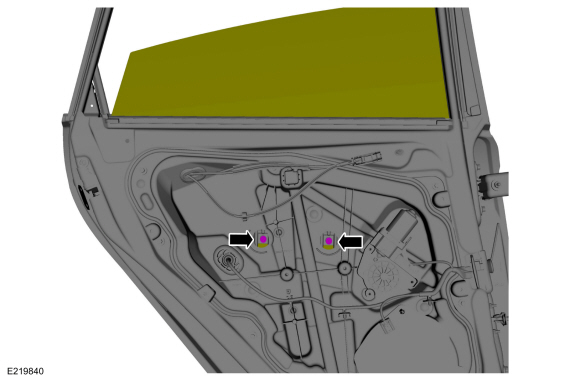
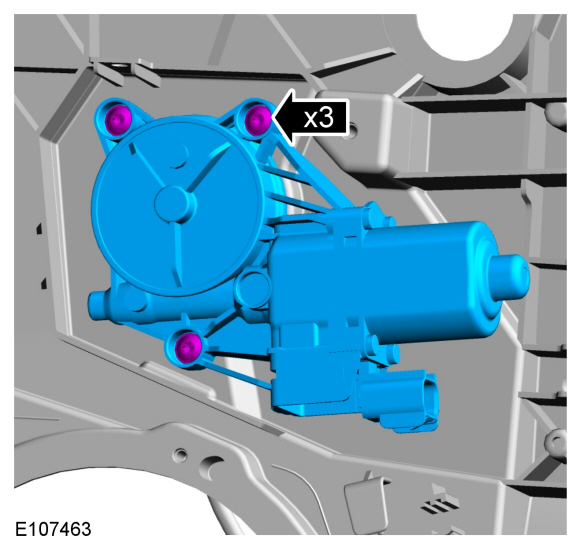
-
Remove the retainers from the rear door window
regulator motor and remove the rear door window regulator motor.
Torque: 31 lb.in (3.5 Nm)
 |
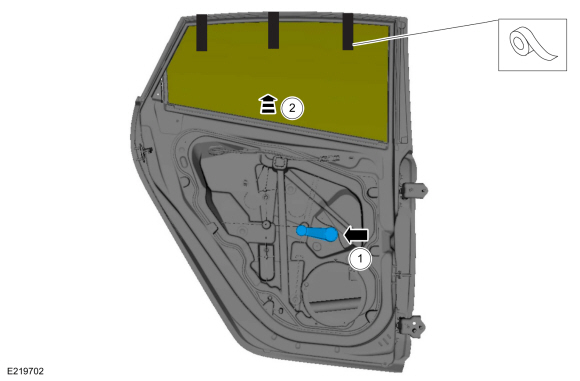
All vehicles
-
Remove the retainers from the rear door window regulator and remove the rear door window regulator.
Torque: 31 lb.in (3.5 Nm)
 |
Installation
-
To install, reverse the removal procedure.
-
If the door is equipped with one-touch up, the power window motor must be initialized.
Refer to: Power Door Window Initialization (501-11 Glass, Frames and Mechanisms, General Procedures).
 Front Door Window Regulator. Removal and Installation
Removal
NOTE:
Removal steps may contain installation details.
NOTE:
Driver side shown, passenger side similar.
All vehicles
Remove the front door trim panel...
 Liftgate Window Glass - 5-Door. Removal and Installation
Special Tool(s) /
General Equipment
300-AST1770EDeluxe Air Knife
Glass Removal Suction Cup
Materials
Name
Specification
Sika® SikaTack® MACH 60 / Sika® SikaTack® MACH 30 / Dow® BETASEAL™ Express
-
Sika Tack ASAP Urethane Adhesive
-
Dow Urethane One Step Glass PrimerBetaprime™ 5500/5500A/5500SA
-
..
Other information:
Ford Fiesta 2014 - 2019 Service Manual: Timing Belt. Removal and Installation
Special Tool(s) / General Equipment 303-1097Locking Tool, Variable Camshaft Timing Oil Control UnitTKIT-2010B-FLMTKIT-2010B-ROW 303-1550Alignment Tool, Crankshaft Vibration DamperTKIT-2012A-FLTKIT-2012A-ROW 303-393-02Adapter for 303-393TKIT-2012A-FLTKIT-2012A-ROW 303-393ALocking Tool, FlywheelTKIT-2012A-FLTKIT-2012A-ROW 303-748Locking Tool, C..
Ford Fiesta 2014 - 2019 Service Manual: Loadspace Trim Panel - 5-Door. Removal and Installation
Removal NOTE: RH side shown, LH side similar. NOTE: Removal steps in this procedure may contain installation details. NOTE: To avoid damage to the trim panels, remove any retaining clips from the body and attach them to the trim panels before installing. Remove the C-pillar upper trim panel. Refer to: C-Pillar Upper Trim Panel - 5-Door (501-05 Interio..
Categories
- Manuals Home
- Ford Fiesta Service Manual (2014 - 2019)
- Engine
- Service Information
- Fuel Pump. Removal and Installation
- Engine Component View. Description and Operation
- Engine Cooling - 1.6L EcoBoost (132kW/180PS) – Sigma
Rear Wheel Speed Sensor. Removal and Installation
Removal
NOTE: Removal steps in this procedure may contain installation details.
Remove the retainer and pull the rear splash shield outward.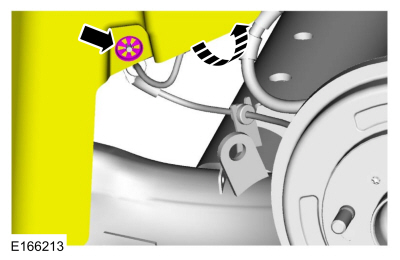 Disconnect the electrical connector and detach the wiring retainer.
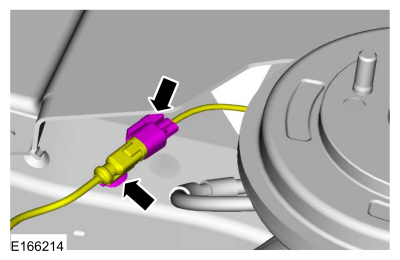
Copyright © 2026 www.fofiesta7.com