Ford Fiesta: Engine System - General Information / Powertrain/Drivetrain Mount Neutralizing. General Procedures
Adjustment
-
Refer to: Jacking and Lifting - Overview (100-02 Jacking and Lifting, Description and Operation).
-
Remove the battery tray.
Refer to: Battery Tray - 1.6L EcoBoost (132kW/180PS) – Sigma (414-01 Battery, Mounting and Cables, Removal and Installation).
Refer to: Battery Tray - 1.6L Duratec-16V Ti-VCT (88kW/120PS) – Sigma
(414-01 Battery, Mounting and Cables, Removal and Installation).
-
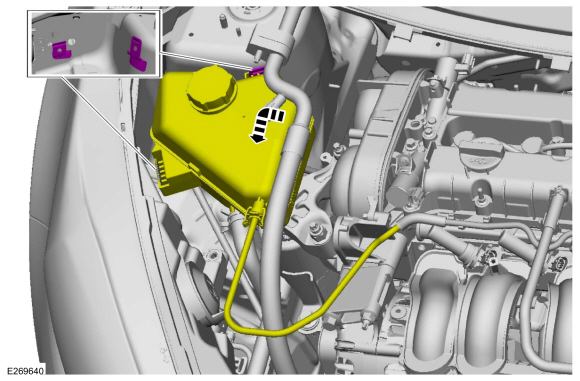
Position the degas bottle aside.
-
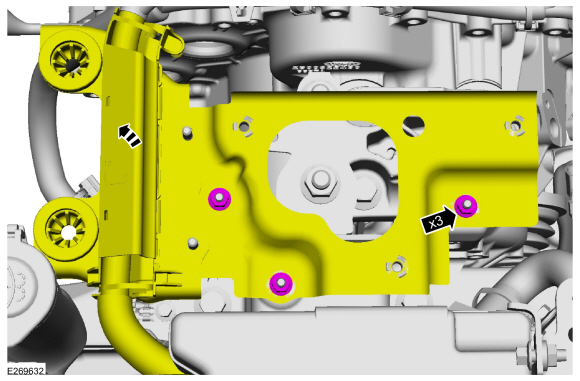
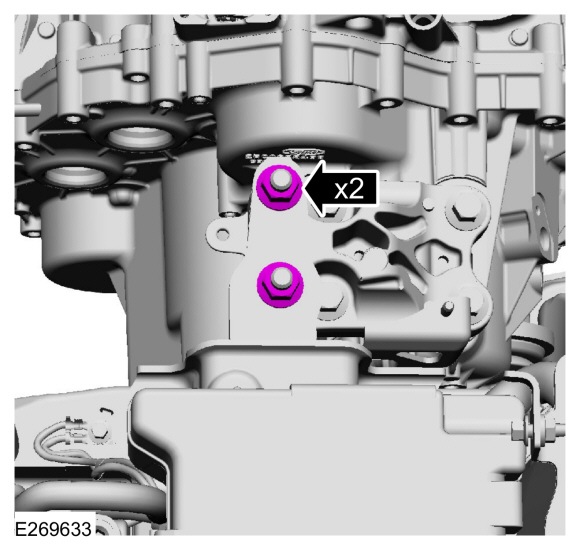
Loosen, but do not remove the engine mount bolts.
-
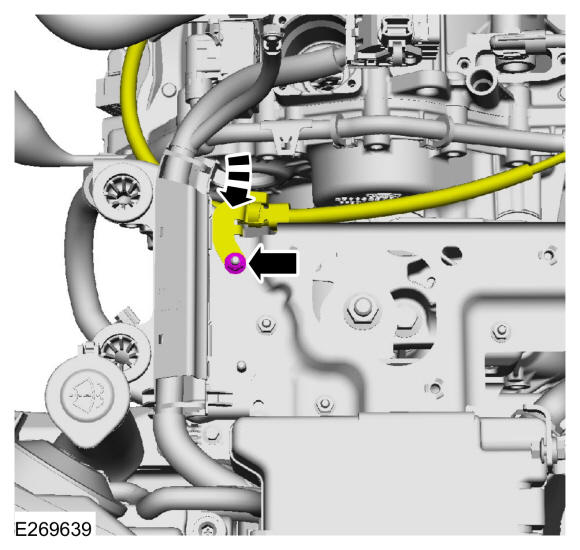
Remove the nut and position the wire aside.
-
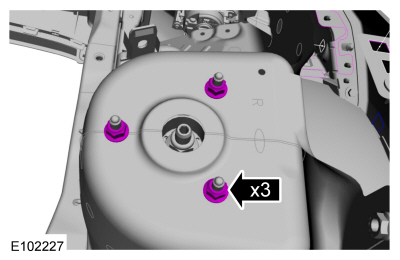
Remove the nuts and position the battery tray bracket aside.
-
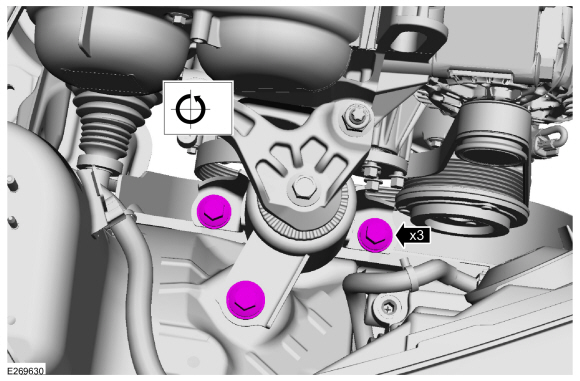
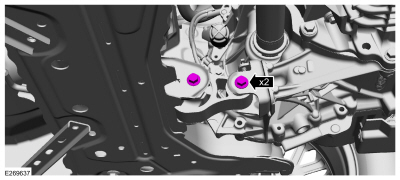
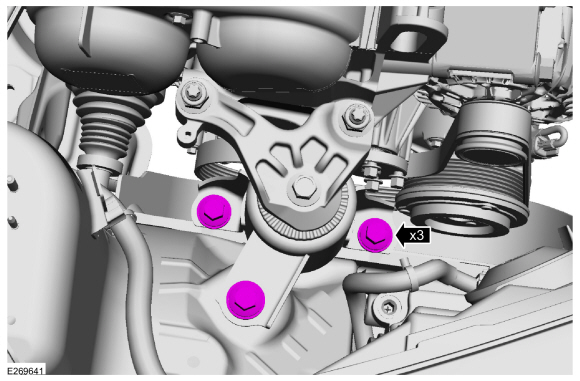
Loosen, but do not remove the transmission mounting assembly nuts.
-
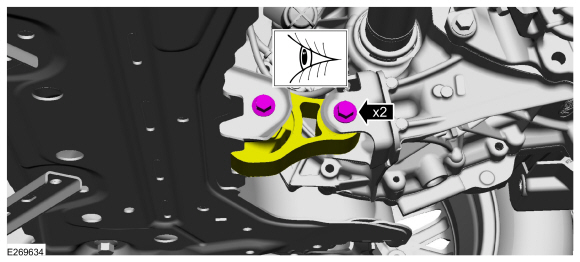
Loosen, but do not remove the 2 roll restrictor bolts. Verify that the roll restrictor is loose.
-
Install the battery tray bracket and nuts.
Torque:
18 lb.ft (25 Nm)
-
Install the battery tray.
Refer to: Battery Tray - 1.6L EcoBoost (132kW/180PS) – Sigma (414-01 Battery, Mounting and Cables, Removal and Installation).
Refer to: Battery Tray - 1.6L Duratec-16V Ti-VCT (88kW/120PS) – Sigma
(414-01 Battery, Mounting and Cables, Removal and Installation).
-
Install the battery.
Refer to: Battery (414-01 Battery, Mounting and Cables, Removal and Installation).
-
NOTE:
Do not twist or strain the powertrain/drivetrain mounts or damage to the mounts may occur.
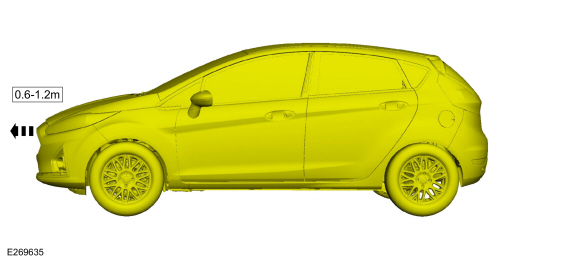
Start the vehicle and move it forward 0.6 m (1.97 ft) - 1.2 m (3.94 ft).
-
NOTE:
Do not twist or strain the powertrain/drivetrain mounts or damage to the mounts may occur.
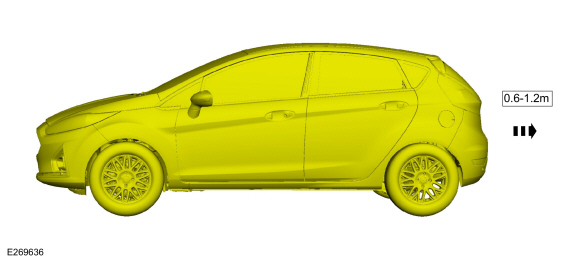
Move the vehicle in reverse the same distance 0.6 m (1.97 ft) - 1.2 m (3.94 ft).
-
Remove the battery tray.
Refer to: Battery Tray - 1.6L EcoBoost (132kW/180PS) – Sigma (414-01 Battery, Mounting and Cables, Removal and Installation).
Refer to: Battery Tray - 1.6L Duratec-16V Ti-VCT (88kW/120PS) – Sigma
(414-01 Battery, Mounting and Cables, Removal and Installation).
-
Remove the nuts and position the battery tray bracket aside.
-
Tighten the roll restrictor bolts.
Torque:
52 lb.ft (70 Nm)
-
Tighten the transmission mounting assembly nuts.
Torque:
92 lb.ft (125 Nm)
-
Install the battery tray bracket and nuts.
Torque:
18 lb.ft (25 Nm)
-
Install the transmission cable and nut.
Torque:
89 lb.in (10 Nm)
-
Install the battery tray.
Refer to: Battery Tray - 1.6L EcoBoost (132kW/180PS) – Sigma (414-01 Battery, Mounting and Cables, Removal and Installation).
Refer to: Battery Tray - 1.6L Duratec-16V Ti-VCT (88kW/120PS) – Sigma
(414-01 Battery, Mounting and Cables, Removal and Installation).
-
Install the battery.
Refer to: Battery (414-01 Battery, Mounting and Cables, Removal and Installation).
-
Position back the degas bottle.
-
Tighten the engine mount bolts.
Torque:
35 lb.ft (48 Nm)
-
Test the system for normal operation.
Check
NOTE:
Refer to the appropriate Section 303-01 for the specification.
Measure the diameter of each intake and exhaust valve
stem at the points shown...
Special Tool(s) /
General Equipment
Plastic Scraper
Nylon Bristle Disk
Plastic Razor Blade
Lint-Free Towel
Isopropyl Alcohol – 90 Percent Minimum
Materials
Name
Specification
Motorcraft® Silicone Gasket RemoverZC-30-A, AZC-30-C
-
Motorcraft® Metal Surface Prep WipesZC-31-B
-
Motorcraft® Engin..
Other information:
Removal
NOTE:
LH side shown, RH side similar.
Remove the front door trim panel.
Refer to: Front Door Trim Panel (501-05 Interior Trim and Ornamentation, Removal and Installation).
Release the retaining clips and remove the interior rear door handle.
NOTE:
This step is only necessary if installing a ne..
Body Control Module
The BCM controls:
Battery saver function
Delayed accessory function
Dimmable backlighting
Exterior lighting
Exterior mirrors defrost
Heated seats
Horn
Interior lighting
Luggage compartment/liftgate release
Parking aid system
Perimeter anti-theft alarm
Power door locks
Po..


 Valve Stem Diameter. General Procedures
 RTV Sealing Surface Cleaning and Preparation. General Procedures
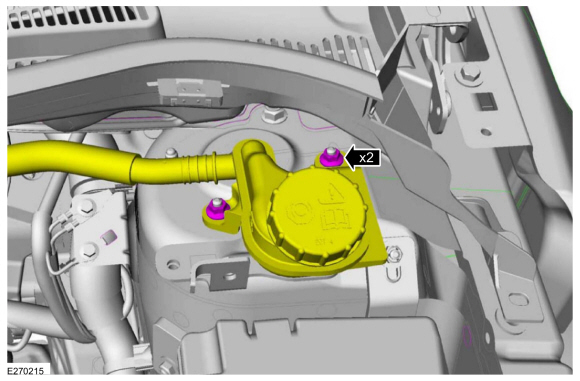 Remove the strut and spring assembly upper mount nuts.