Ford Fiesta: Interior Trim and Ornamentation / Headliner - Lowering - 5-Door. Removal and Installation
Ford Fiesta 2014 - 2019 Service Manual / Body and Paint / Interior Trim and Ornamentation / Headliner - Lowering - 5-Door. Removal and Installation
-
On both sides.
Remove the retainers and the sun visor.
 |
-
On both sides.
Remove the retainer and the sun visor clip.
 |
-
On both sides, remove the A-pillar trim panel.
Refer to: A-Pillar Trim Panel (501-05 Interior Trim and Ornamentation, Removal and Installation).
-
On both sides, remove the B-pillar trim panel.
Refer to: B-Pillar Trim Panel (501-05 Interior Trim and Ornamentation, Removal and Installation).
-
On both sides, remove the C-pillar lower trim panel.
Refer to: C-Pillar Lower Trim Panel (501-05 Interior Trim and Ornamentation, Removal and Installation).
-
NOTE: RH side shown, LH side similar.
On both sides.
Release the clips and position aside the upper C-pillar trim panel.
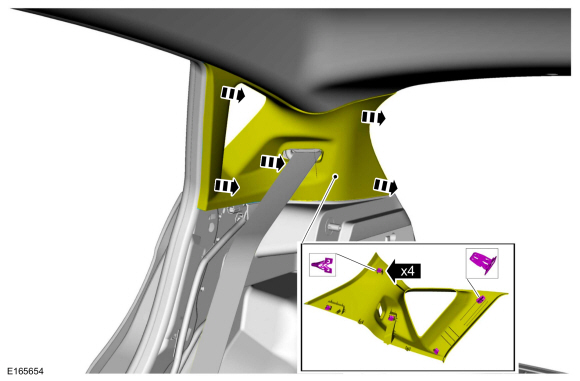 |
-
Release the clips, disconnect the electrical connectors and remove the overhead console.
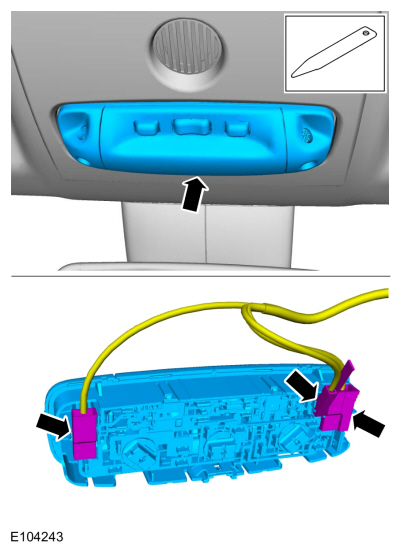 |
-
-
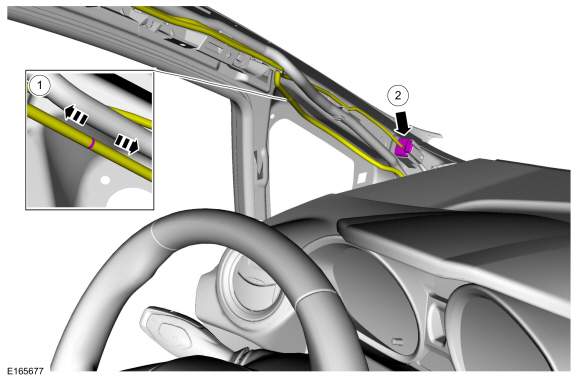
NOTICE: Plug the rear washer hose after disconnecting. Failure to do so will result in damage to the interior due to fluid leakage.
Disconnect the rear washer hose and position the hose aside.
-
Disconnect the headliner wire harness electrical connector and position the wire harness aside.
-
 |
-
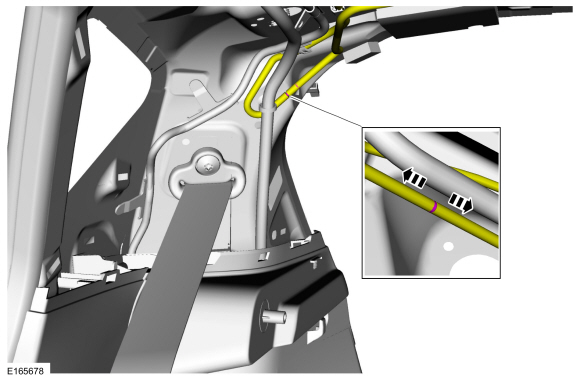
On the RH side, disconnect the headliner wire harness electrical connector.
 |
-
If equipped.
Remove the roof opening panel seal.
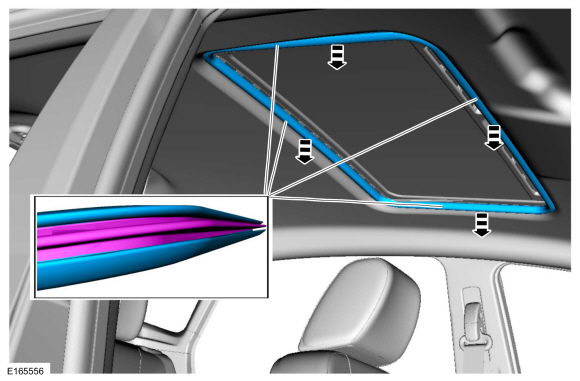 |
-
-
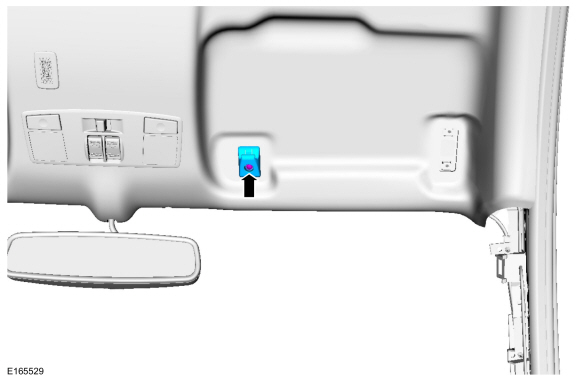
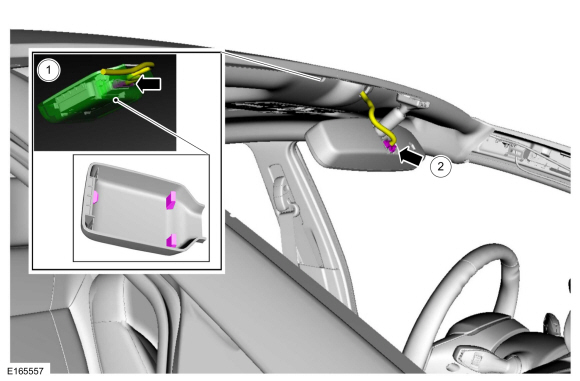
If equipped.
Remove cover and disconnect the electrical connector.
-
If equipped.
Disconnect the rear view mirror electrical connector.
-
If equipped.
 |
-
NOTE: Headliner removed for clarity.
If equipped.
Disconnect the roof opening panel electrical connector.
 |
-
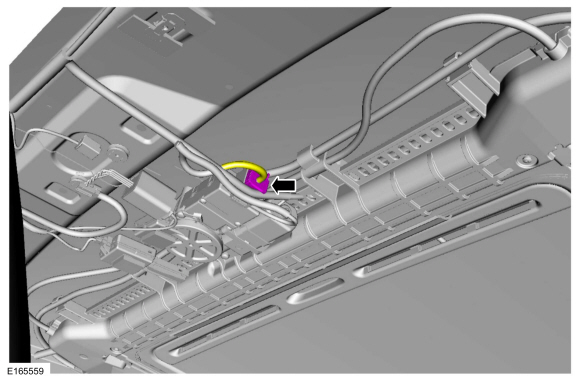
NOTICE: Plug the rear washer hose after disconnecting. Failure to do so will result in damage to the interior due to fluid leakage.
On RH side.
Disconnect the rear washer hose and position the hose aside.
 |
-
-
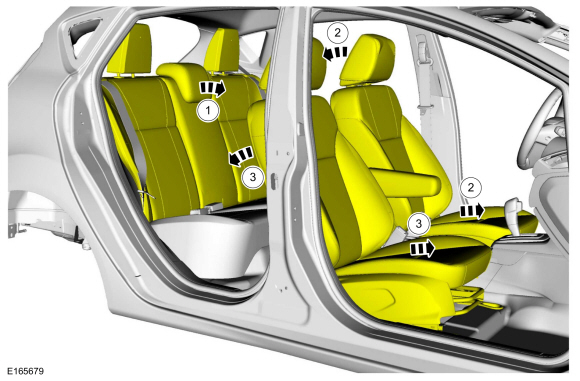
Position the rear seat backrests in the fold flat position.
-
Position the driver side front seat in the full forward and full reclined position.
-
Position the passenger side front seat in the full forward and full reclined position.
-
Position the rear seat backrests in the fold flat position.
 |
-
Lower the headliner.
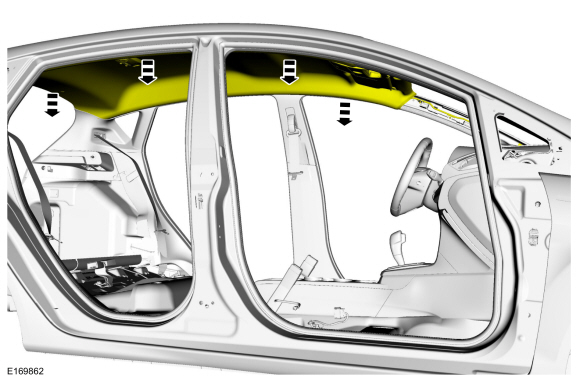 |
 Headliner - 5-Door. Removal and Installation
Materials
Name
Specification
3M™ Super-Fast Repair Adhesive04747
-
Removal
On both sides.
Remove the retainers and the sun visor...
 Parcel Shelf. Removal and Installation
Removal
NOTE:
Removal steps in this procedure may contain installation details.
Remove the rear seat cushion.
Refer to: Rear Seat Cushion (501-10 Seating, Removal and Installation)...
Other information:
Ford Fiesta 2014 - 2019 Service Manual: Liftgate Release Switch. Removal and Installation
Removal Remove the luggage compartment lid moulding - 5 door. Refer to: Luggage Compartment Lid Moulding - 5-Door (501-08 Exterior Trim and Ornamentation, Removal and Installation). Remove the liftgate release switch...
Ford Fiesta 2014 - 2019 Service Manual: Oil Pan. Removal and Installation
Special Tool(s) / General Equipment Strap Wrench Oil Drain Equipment Materials Name Specification Motorcraft® High Performance Engine RTV SiliconeTA-357 WSE-M4G323-A6 Engine Oil - SAE 5W-20 - Synthetic Blend Motor OilXO-5W20-Q1SP WSS-M2C945-B1 Removal With the vehicle in NEUTRAL, position it on a hoist...
Categories
- Manuals Home
- Ford Fiesta Service Manual (2014 - 2019)
- Engine Cooling - 1.6L EcoBoost (132kW/180PS) – Sigma
- Service Information
- Manual Transmission, Clutch, Transfer Case and Power Transfer Unit
- Engine - 1.6L EcoBoost (132kW/180PS) – Sigma
- Camshafts. Removal and Installation
Axle. Removal and Installation
Special Tool(s) / General Equipment
Flat Headed Screw Driver Transmission Jack Vehicle/Axle StandsRemoval
NOTICE: Suspension fasteners are critical parts that affect performance of vital components and systems. Failure of these fasteners may result in major service expense. Use the same or equivalent parts if replacement is necessary. Do not use a replacement part of lesser quality or substitute design. Tighten fasteners as specified.
Remove the floor console.Refer to: Floor Console (501-12 Instrum
Copyright © 2026 www.fofiesta7.com