Ford Fiesta: Side Panel Sheet Metal Repairs / Front Door Skin Panel. Removal and Installation
Special Tool(s) /
General Equipment
| Grinder |
| Hot Air Gun |
| Knife |
| MIG/MAG Welding Equipment |
Materials
| Name |
Specification |
Metal Bonding Adhesive
TA-1, TA-1-B, 3M™ 08115, LORD Fusor® 108B, Henkel Teroson EP 5055 |
-
|
Seam Sealer
TA-2-B, 3M™ 08308, LORD Fusor® 803DTM |
-
|
Flexible Foam Repair
3M™ 08463, LORD Fusor® 121 |
-
|
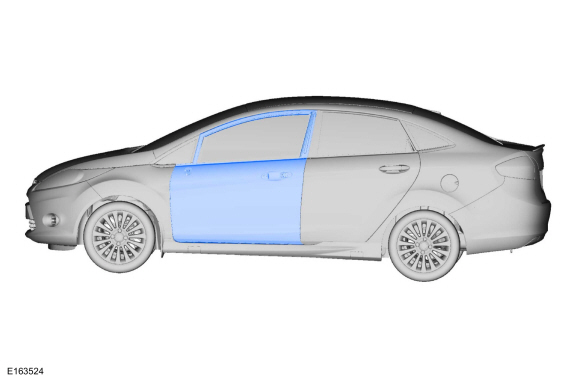
Removal
NOTE:
LH side shown, RH side similar.
-
 WARNING:
Before beginning any service procedure in this
section, refer to Safety Warnings in section 100-00 General Information.
Failure to follow this instruction may result in serious personal
injury.
WARNING:
Before beginning any service procedure in this
section, refer to Safety Warnings in section 100-00 General Information.
Failure to follow this instruction may result in serious personal
injury.
Refer to: Body Repair Health and Safety and General Precautions (100-00 General Information, Description and Operation).
-
Inspect the upper and lower door hinges for wear or damage, install new or rebuild as necessary.
-
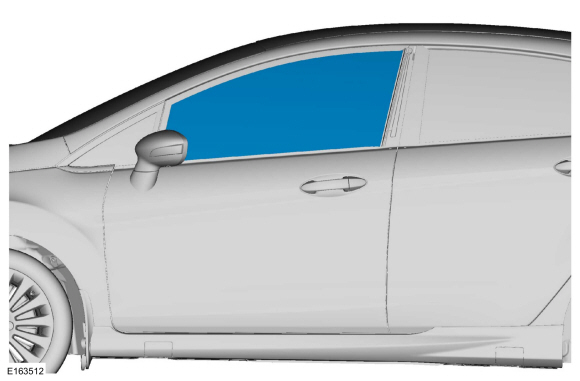
Remove the window glass.
Refer to: Front Door Window Glass (501-11 Glass, Frames and Mechanisms, Removal and Installation).
-
Remove the front door.
Refer to: Front Door (501-03 Body Closures, Removal and Installation).
-
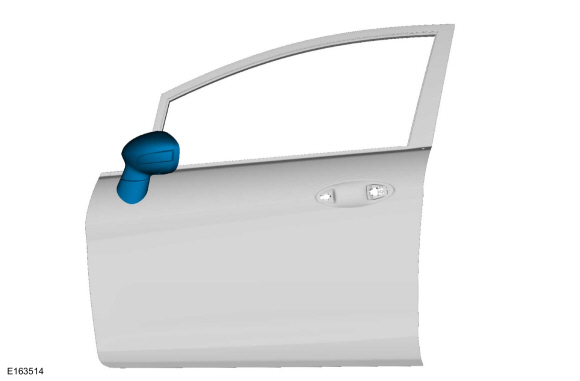
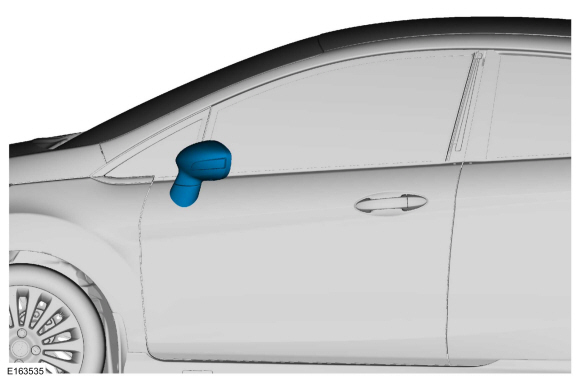
Remove the exterior mirror.
Refer to: Exterior Mirror (501-09 Rear View Mirrors, Removal and Installation).
-
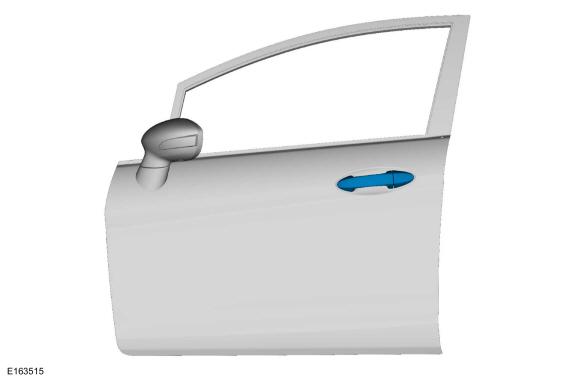
Remove the exterior front door handle.
Refer to: Exterior Front Door Handle (501-14 Handles, Locks, Latches and Entry Systems, Removal and Installation).
-
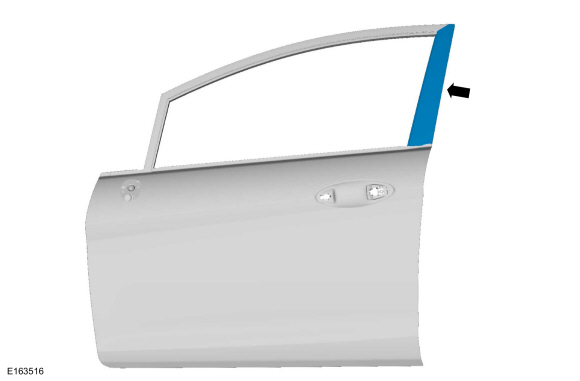
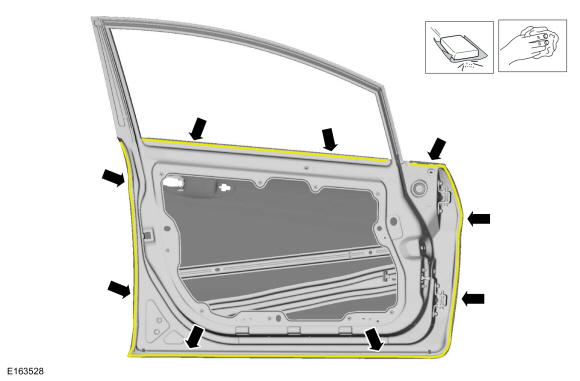
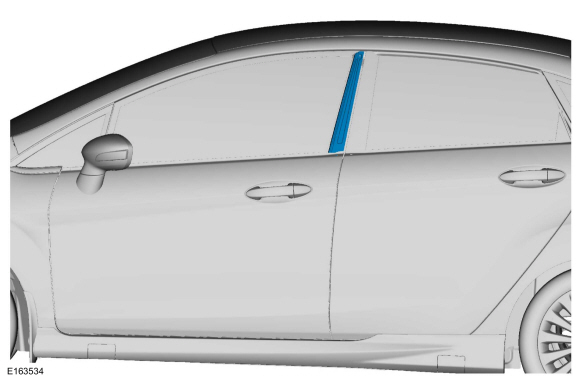
Remove the front door upper moulding.
-
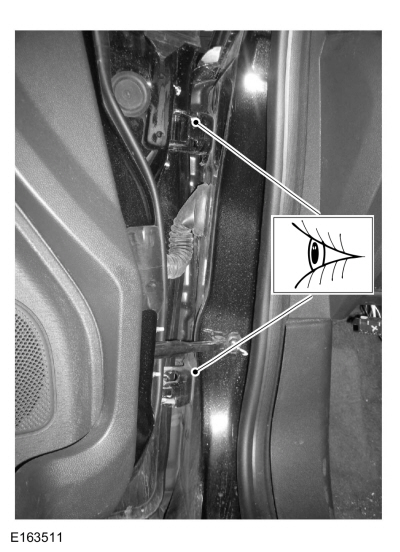
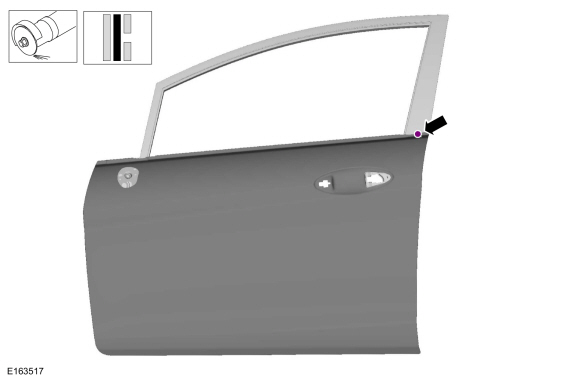
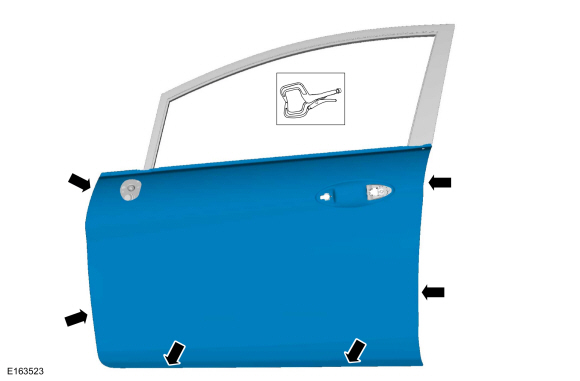
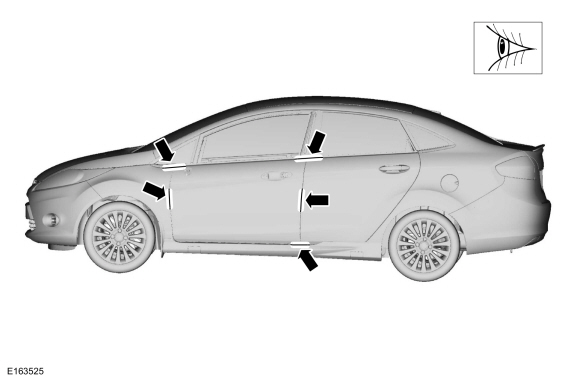
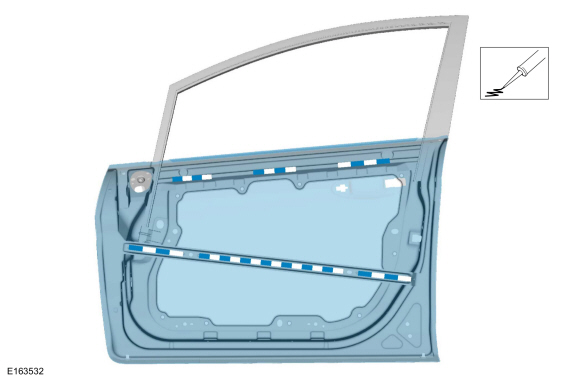
Carefully cut the tack welds.
Use the General Equipment: Grinder
-
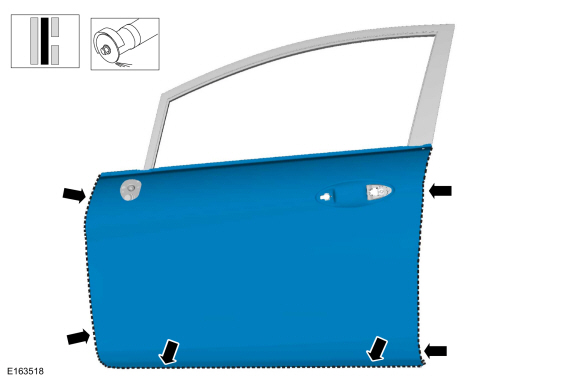
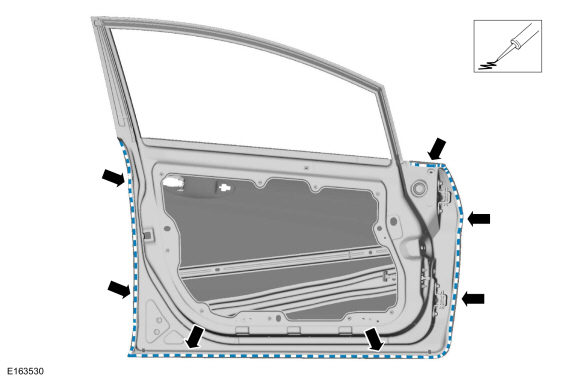
Carefully cut and remove the outer door panel only.
Use the General Equipment: Grinder
-
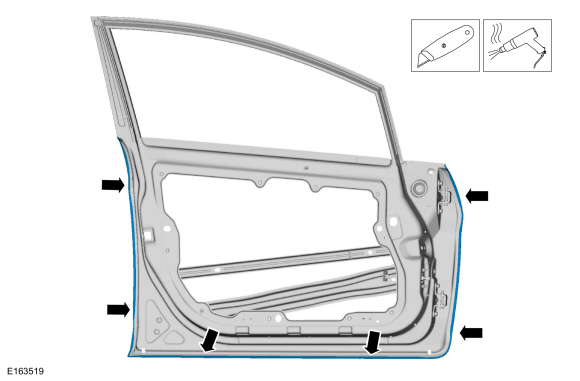
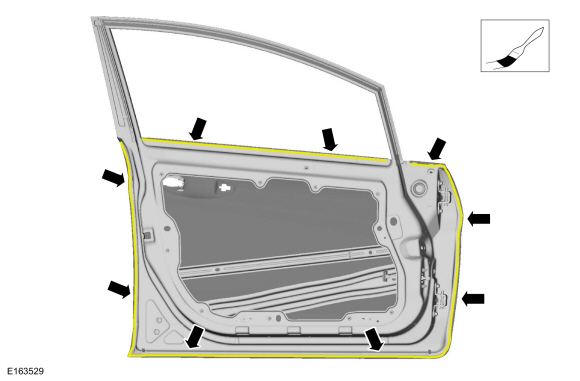
Break the adhesive bond and remove the remaining portion of the front door panel hem flange.
Use the General Equipment: Knife
Use the General Equipment: Hot Air Gun
Installation
-
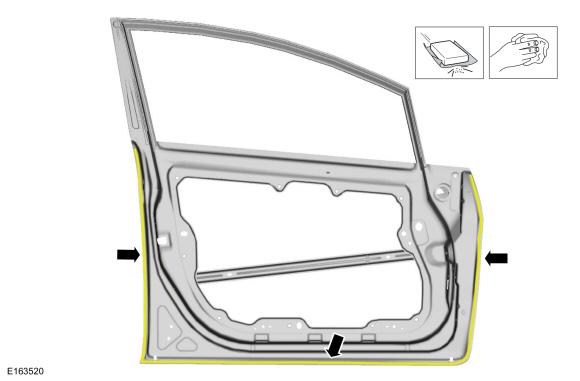
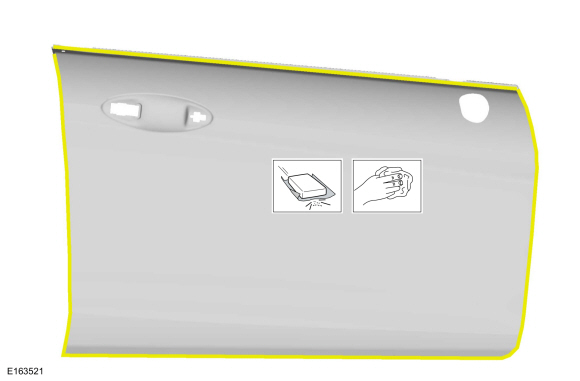
Remove all adhesive and foreign materials from the door shell to outer door panel mating surfaces.
-
Remove the e-coat from the mating surface.
-
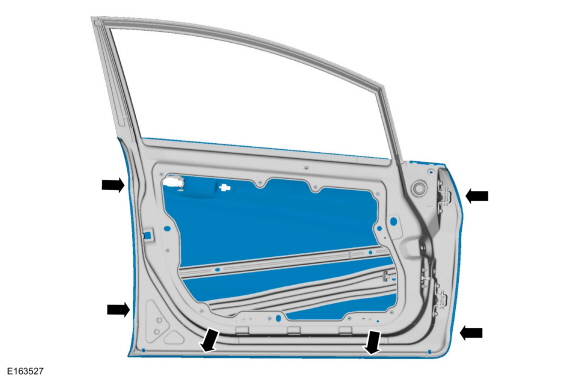
Apply adhesive to the door shell mating surface.
Material: Metal Bonding Adhesive
/ TA-1, TA-1-B, 3M™ 08115, LORD Fusor® 108B, Henkel Teroson EP 5055
-
Install the outer door panel and partially crimp the flange.
-
Temporarily install the door on the vehicle.
-
Check for proper alignment and adjust as necessary.
-
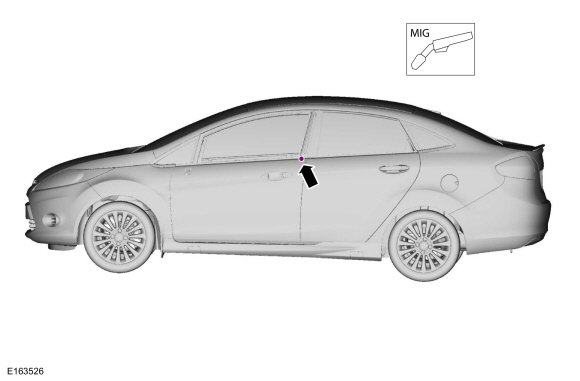
Carefully open the door and tack weld to lock panel in place.
Use the General Equipment: MIG/MAG Welding Equipment
-
Remove the door from the vehicle.
-
NOTE:
Smooth any residual adhesive squeeze-out in to the seam to act as a sealer.
Complete the hemming process.
-
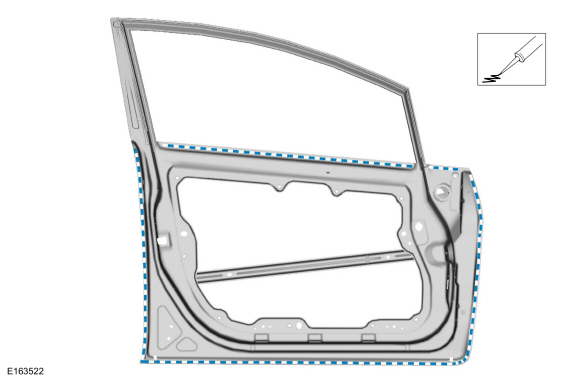
Sand and clean the door hem flange.
-
Apply a Ford approved primer to the flange area.
-
Apply seam sealer as indicated.
Material: Seam Sealer
/ TA-2-B, 3M™ 08308, LORD Fusor® 803DTM
-
Refinish the door shell flange using a Ford approved paint system.
-
Install the door.
-
Sand and refinish the exterior repair area using a Ford approved paint system.
-
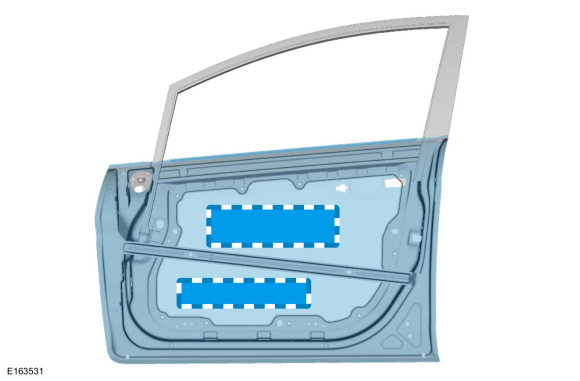
Install NVH mastic pads (obtain locally).
-
Apply NVH foam as indicated.
Material: Flexible Foam Repair
/ 3M™ 08463, LORD Fusor® 121
-
Install the exterior front door handle.
Refer to: Exterior Front Door Handle (501-14 Handles, Locks, Latches and Entry Systems, Removal and Installation).
-
Install the exterior mirror.
Refer to: Exterior Mirror (501-09 Rear View Mirrors, Removal and Installation).
-
Install the front door upper moulding.
-
Restore corrosion protection.
Refer to: Corrosion Prevention (501-25 Body Repairs - General Information, General Procedures).
-
Install the window glass.
Refer to: Front Door Window Glass (501-11 Glass, Frames and Mechanisms, Removal and Installation).
-
Align the door.
Refer to: Front Door Alignment (501-03 Body Closures, General Procedures).
Special Tool(s) /
General Equipment
Grinder
Hot Air Gun
Knife
MIG/MAG Welding Equipment
Locking Pliers
Materials
Name
Specification
Metal Bonding AdhesiveTA-1, TA-1-B, 3M™ 08115, LORD Fusor® 108B, Henkel Teroson EP 5055
-
Seam SealerTA-2-B, 3M™ 08308, LORD Fusor® 803DTM
-
Flexible Foam Repai..
Other information:
On both sides.
Remove the retainers and the sun visor.
On both sides.
Remove the retainer and the sun visor clip.
On both sides, remove the A-pillar trim panel.
Refer to: A-Pillar Trim Panel (501-05 Interior Trim and Ornamentation, Removal and Installation).
On both sides, remo..
Original Fluids
Name
Fill Capacity
Material: Motorcraft® Orange Concentrated Antifreeze/Coolant
/ VC-3-B
(WSS-M97B44-D)
8.45
qt (
8
L)
Material: Motorcraft® Orange Prediluted Antifreeze/Coolant
/ VC-3DIL-B
(WSS-M97B44-D2)
..
Categories
Preliminary Inspection
Verify the customer concern by carrying out a road test on a
smooth road. If any vibrations are apparent, Refer to the Symptom
Chart: NVH.
To maximize tire performance, inspect for signs of incorrect
inflation and uneven wear, which may indicate a need for balancing,
rotation or front suspension alignment.
Correct tire pressure and driving techniques have an
important influence on tire life. Heavy cornering, excessively rapid
acceleration and unnecessary sharp braking increase tire wear.
Correct
tire pressure and driving techniques have an important influence on
tire life. Heavy cornering, exce
read more


 Rear Door Skin Panel. Removal and Installation