Ford Fiesta: Climate Control System - General Information / Air Conditioning (A/C) Compressor Leak Detection. General Procedures
Ford Fiesta 2014 - 2019 Service Manual / Climate Control System / Climate Control System - General Information / Air Conditioning (A/C) Compressor Leak Detection. General Procedures
Special Tool(s) / General Equipment
| Air Conditioning Service Unit | |
| Electronic Leak Detector | |
| Air Conditioning Adaptor Kit |
Leak detection
-
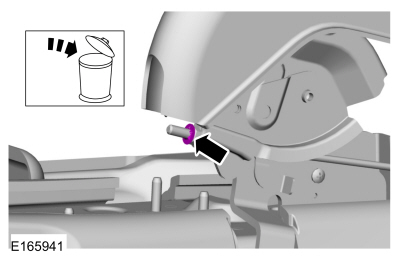
Recover the refrigerant. Refer to Air Conditioning (A/C)
System Recovery, Evacuation and Charging procedure in Group 412.
-
Disconnect the refrigerant lines from the A/C compressor. Refer to the appropriate section in Group 412 for the procedure.
-
Install the adapters from the A/C Flush Adapter Kit on the ports of the A/C compressor, using the existing retaining bolts.
-
219-00082 ACF-3000 33PC Adapter Kit - Revised 1st released 44pc kit
-
219-00083 A/C Flushing Adapter Kit 2 of 3 (Previously "Supplement A", 2nd released kit)
-
219-00084 A/C Flushing Adapter Kit 3 of 3
Use the General Equipment: Air Conditioning Adaptor Kit
-
219-00082 ACF-3000 33PC Adapter Kit - Revised 1st released 44pc kit
-
Connect the high and low pressure lines of the air
conditioning service unit to the corresponding fittings on the adapter.
-
265‐37887 Ritchie R134A A/C Refrigerant Hybrid Management System
Use the General Equipment: Air Conditioning Service Unit
-
265‐37887 Ritchie R134A A/C Refrigerant Hybrid Management System
-
Charge the A/C
compressor following the air conditioning service unit instructions.
Open the low pressure valve, the high pressure valve and set the
refrigerant charge amount to 0.23 kg (8 oz).
-
NOTE: Use a Rotunda-approved Electronic Leak Detector for R-134a refrigerant SAE Certified to J2791.
Using the Refrigerant Leak Detector, check for leaks at the compressor shaft.
-
023‐22791 Robinair Infrared A/C Refrigerant Leak Detector w/Case
Use the General Equipment: Electronic Leak Detector
-
023‐22791 Robinair Infrared A/C Refrigerant Leak Detector w/Case
-
When the leak test is complete, recover the refrigerant from the compressor.
-
If an external leak is found, install a new A/C compressor.
 Air Conditioning (A/C) Clutch and Air Conditioning (A/C) Clutch Field Coil. General Procedures
Special Tool(s) /
General Equipment
412-001
(T71P-19703-B)
Remover, Compressor Pulley
Activation
Remove the A/C compressor...
 Air Conditioning (A/C) Odor Treatment. General Procedures
Special Tool(s) /
General Equipment
A/C Odor Remover Flexible Applicator
Materials
Name
Specification
Motorcraft® A/C Cooling Coil CoatingYN-29
-
Inspection
NOTE:
There are typically 4 types of objectionable odors found in a vehicle:
chemical odors
environmental odors
human and other interior-generated odors
..
Other information:
Ford Fiesta 2014 - 2019 Service Manual: Battery Tray - 1.6L EcoBoost (132kW/180PS) – Sigma. Removal and Installation
Removal WARNING: Before beginning any service procedure in this section, refer to Safety Warnings in section 100-00 General Information. Failure to follow this instruction may result in serious personal injury. Follow the health and safety precautions. Refer to: Health and Safety Precautions (100-00 General Information, Description and Operation). ..
Ford Fiesta 2014 - 2019 Service Manual: Safety Precautions - Overview. Description and Operation
Overview WARNING: Before beginning any service procedure in this section, refer to Safety Warnings in section 100-00 General Information. Failure to follow this instruction may result in serious personal injury. Refer to: Health and Safety Precautions (100-00 General Information, Description and Operation). WARNING: Before servicing any tire, ask the ..
Categories
- Manuals Home
- Ford Fiesta Service Manual (2014 - 2019)
- Valve Cover. Removal and Installation
- Front Suspension
- Engine Component View. Description and Operation
- Engine. Assembly
- Engine Cooling - 1.6L EcoBoost (132kW/180PS) – Sigma
Parking Brake Control. Removal and Installation
Removal
NOTE: Removal steps in this procedure may contain installation details.
Remove the floor console.Refer to: Floor Console (501-12 Instrument Panel and Console, Removal and Installation).
Remove the driver seat.
Refer to: Front Seat (501-10 Seating, Removal and Installation).
Remove the parking brake cable adjustment lock nut.
 Loosen the parking brake cable adjustment nut.
Copyright © 2026 www.fofiesta7.com